Producing training videos: A practical, proven method to engage learners
- MEDIAL

- Jan 25
- 16 min read
Before you even think about hitting the record button, let's talk about the most important part of producing training videos: the planning. This isn't just about jotting down a few ideas; it’s the strategic foundation that ensures your video actually teaches something and solves a real problem. Without it, you’re just filming in the dark.
Building Your Video Training Blueprint
Jumping straight into production is a recipe for a video that completely misses the mark. An effective training video doesn't just throw information at viewers; it guides them toward a specific, measurable skill. This is where you map everything out to make your content genuinely impactful.
The first move is to ditch vague goals and get laser-focused on learning objectives. "Teach employees about the new CRM software" is a weak objective—it’s broad and you can't measure it. A much stronger objective sounds like this: "After watching this video, sales reps will be able to log a customer call, update a contact record, and create a new sales opportunity in the CRM in under two minutes." See the difference? That level of clarity tells you exactly what to show and, just as importantly, what to leave out.
Define Your Audience and Their Needs
Once your objectives are crystal clear, it’s all about your audience. Who are you actually making this for? Are they tech-savvy new starters or seasoned veterans who might be a bit resistant to change? Getting a handle on their current knowledge and how they like to learn is absolutely crucial. You wouldn't create a jargon-heavy technical deep-dive for a non-technical team.
Ask yourself these questions to get inside their heads:
What’s their current skill level? Don't waste time re-explaining things they already know. An actionable insight here is to create a quick, optional "refresher" video on the basics and link to it at the start.
What are their biggest pain points? Frame your training as the solution to a problem they’re actively struggling with. For example, instead of a generic "How to use our reporting software," create a video titled "How to create a sales report in under 60 seconds."
How do they consume content? Field agents might need short, mobile-friendly clips they can watch on the go, while office-based staff may have time for a more detailed desktop tutorial. A practical step is to check company device usage data to see if most access is mobile or desktop, and format your video accordingly.
One of the most common mistakes I see is a one-size-fits-all video. By tailoring the tone, pace, and complexity to a specific group, you dramatically increase the chances of the training actually sticking.
This simple flow shows how these initial stages connect to build a solid strategy.
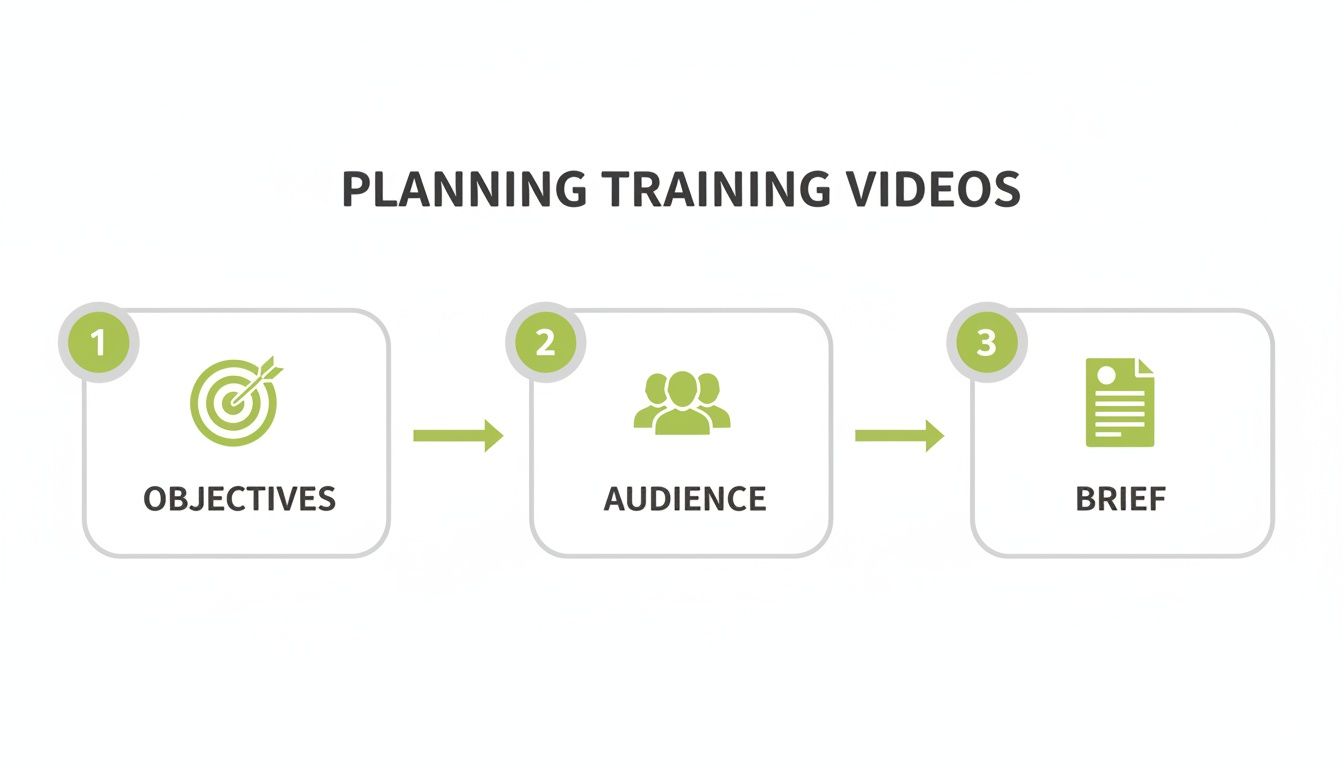
As you can see, a successful project starts with clear goals, is shaped by audience needs, and is cemented in a detailed brief.
Create a Focused Creative Brief
The final piece of your blueprint is the creative brief. Think of this document as your project's North Star. It brings together your objectives, audience insights, and key messages into one central place, ensuring everyone—from the subject matter expert to the editor—is on the same page.
Your brief should nail down the video's core purpose, the single most important thing you want viewers to remember, and what you want them to do after watching. This is also where you define the tone. A practical example: for a mandatory compliance video, the tone might be "serious and direct," while a video on a new employee perk could be "upbeat and informal."
For a deeper dive into the principles behind this kind of planning, you might find our guide on course instructional design helpful. For a more complete look at how to create training videos that truly connect, that guide is an excellent resource. Putting in this work upfront is what prevents costly reshoots and ensures your final video is a sharp, effective training tool.
How to Script and Storyboard for Engagement
Now that you have your learning objectives sorted, it's time to bring them to life with a script and a visual plan. I can’t stress this enough: don't skip this step. Rushing straight to recording is a recipe for rambling, unfocused videos that end up being a nightmare to edit—or worse, needing a complete reshoot.
A solid script is the very soul of your training video. It's what ensures you hit every key point without getting lost along the way. Think of it less like a formal document and more like you're explaining something to a colleague over a coffee.

From Objectives to a Conversational Script
The key here is to write for the ear, not the eye. Use short sentences, everyday language, and a friendly, supportive tone. A great trick is to read your lines out loud as you write them. If a sentence feels clunky or awkward to say, it’s going to sound ten times worse on camera.
For instance, instead of writing something robotic like, "The user must then initiate the data synchronisation process by navigating to the administrative panel," make it human. A much better version would be, "Next, you’ll need to sync your data. Just head over to the admin panel, and I’ll show you where to click." See the difference? One sounds like a technical manual, the other like a helpful guide.
A classic mistake I see all the time is trying to cram too much into a single video. Stick to one core idea per video. Research consistently shows that viewers retain information far better when it's delivered in short, focused chunks, ideally between 3-7 minutes long.
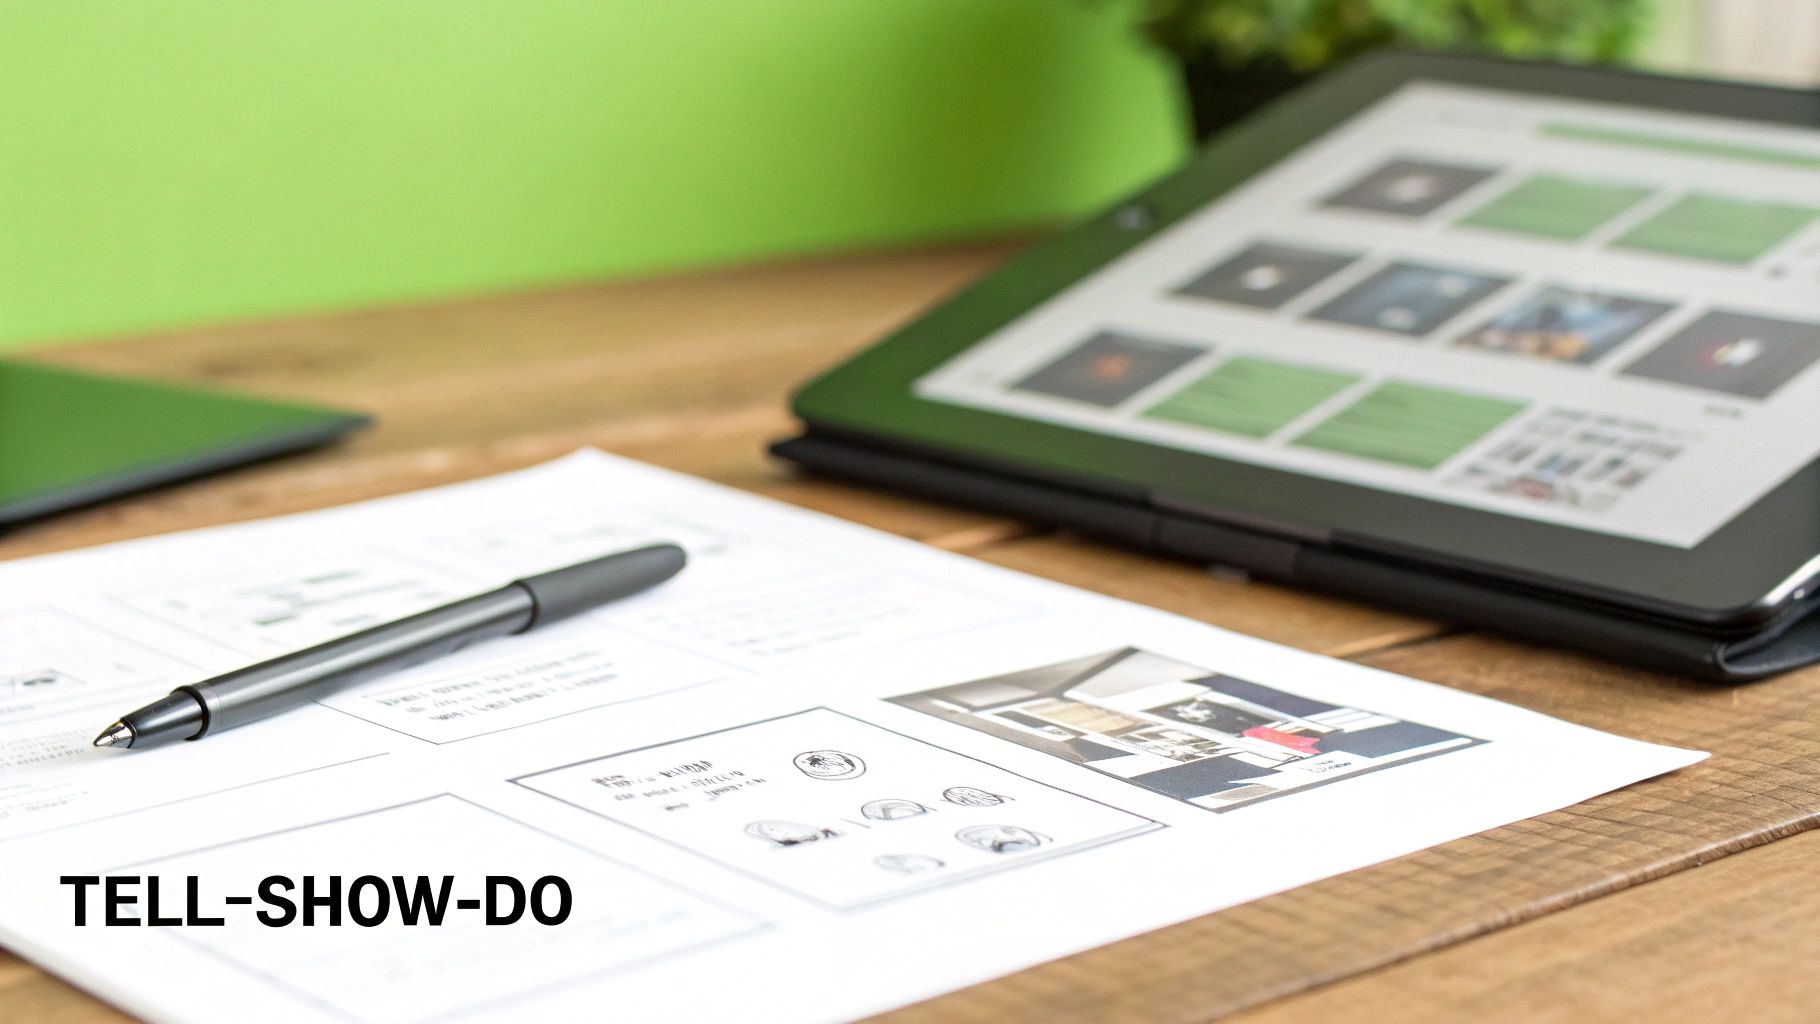
Structuring Your Content with the Tell-Show-Do Model
A simple but incredibly effective framework for any instructional video is the Tell-Show-Do model. It’s a proven method for helping learners actually remember what you've taught them because it speaks to different learning styles.
Here’s a quick breakdown of how it works:
Tell: Start by explaining what the learner is about to see and, crucially, why it matters. State the objective clearly. For example, "In this video, I'm going to tell you how to create a pivot table in Excel to summarise your sales data."
Show: Now you demonstrate the process. Use a screen recording or a live shot to walk through the exact steps you just described, narrating as you go. "First, I'll select all the data. Then, I'll click on the 'Insert' tab and choose 'PivotTable'."
Do: Finally, give the learner a chance to apply what they've just seen. This could be as simple as asking them to pause the video and try it themselves, adding a quick quiz question, or setting a video assignment in your LMS where they record themselves doing the task.
This structure is so powerful because it moves the learner from just watching to actively doing, which is where real learning happens.
Visualising the Flow with a Storyboard
Once your script is feeling good, it's time to sketch out a storyboard. A storyboard is basically a visual map of your video, scene by scene. It doesn't have to be a masterpiece—simple stick figures or descriptive text work perfectly fine. The real purpose is to force you to think about what the viewer will see on screen while they're hearing your narration.
An actionable way to do this is to create a simple two-column table. In the left column ("Audio"), paste your script. In the right column ("Visual"), describe what should be on screen. For example: Audio: "First, open the main dashboard." Visual: "Screen recording shows a mouse cursor clicking on the 'Dashboard' icon."
Getting this mapped out beforehand will save you a world of pain during recording and editing. It helps you catch potential problems, like a confusing sequence or a missed opportunity for a helpful graphic, before you’ve poured time and effort into filming.
To make this process smoother, I've put together a little checklist. Think of it as a guide to keep you on track as you move from your written words to a visual plan.
Scripting and Storyboarding Checklist
Phase | Key Task | Pro Tip |
|---|---|---|
Scripting | Write in a natural, conversational tone. | Read every line out loud. If it doesn't flow when you say it, rewrite it until it does. |
Scripting | Stick to one main topic per video. | Keep videos short and focused (aim for 3-7 minutes) to maximise engagement and retention. |
Scripting | Structure using the Tell-Show-Do model. | Clearly separate your explanation (Tell), demonstration (Show), and the call to action (Do). |
Storyboarding | Sketch or describe the visuals for each line of script. | Simple is fine! Use a two-column table (Audio/Visual) to keep it organised and scannable. |
Storyboarding | Plan for on-screen text, graphics, and highlights. | Think about what visual aids will make the concept clearer. A well-placed arrow or text box can make a huge difference. |
Review | Do a final read-through of the script and storyboard together. | Check for any disconnects. Does what you're saying match what the viewer is seeing at all times? |
Following this simple process is what separates a polished, professional video from an amateur one. It ensures your visuals and audio are perfectly in sync, creating a clear and effective learning experience from start to finish.
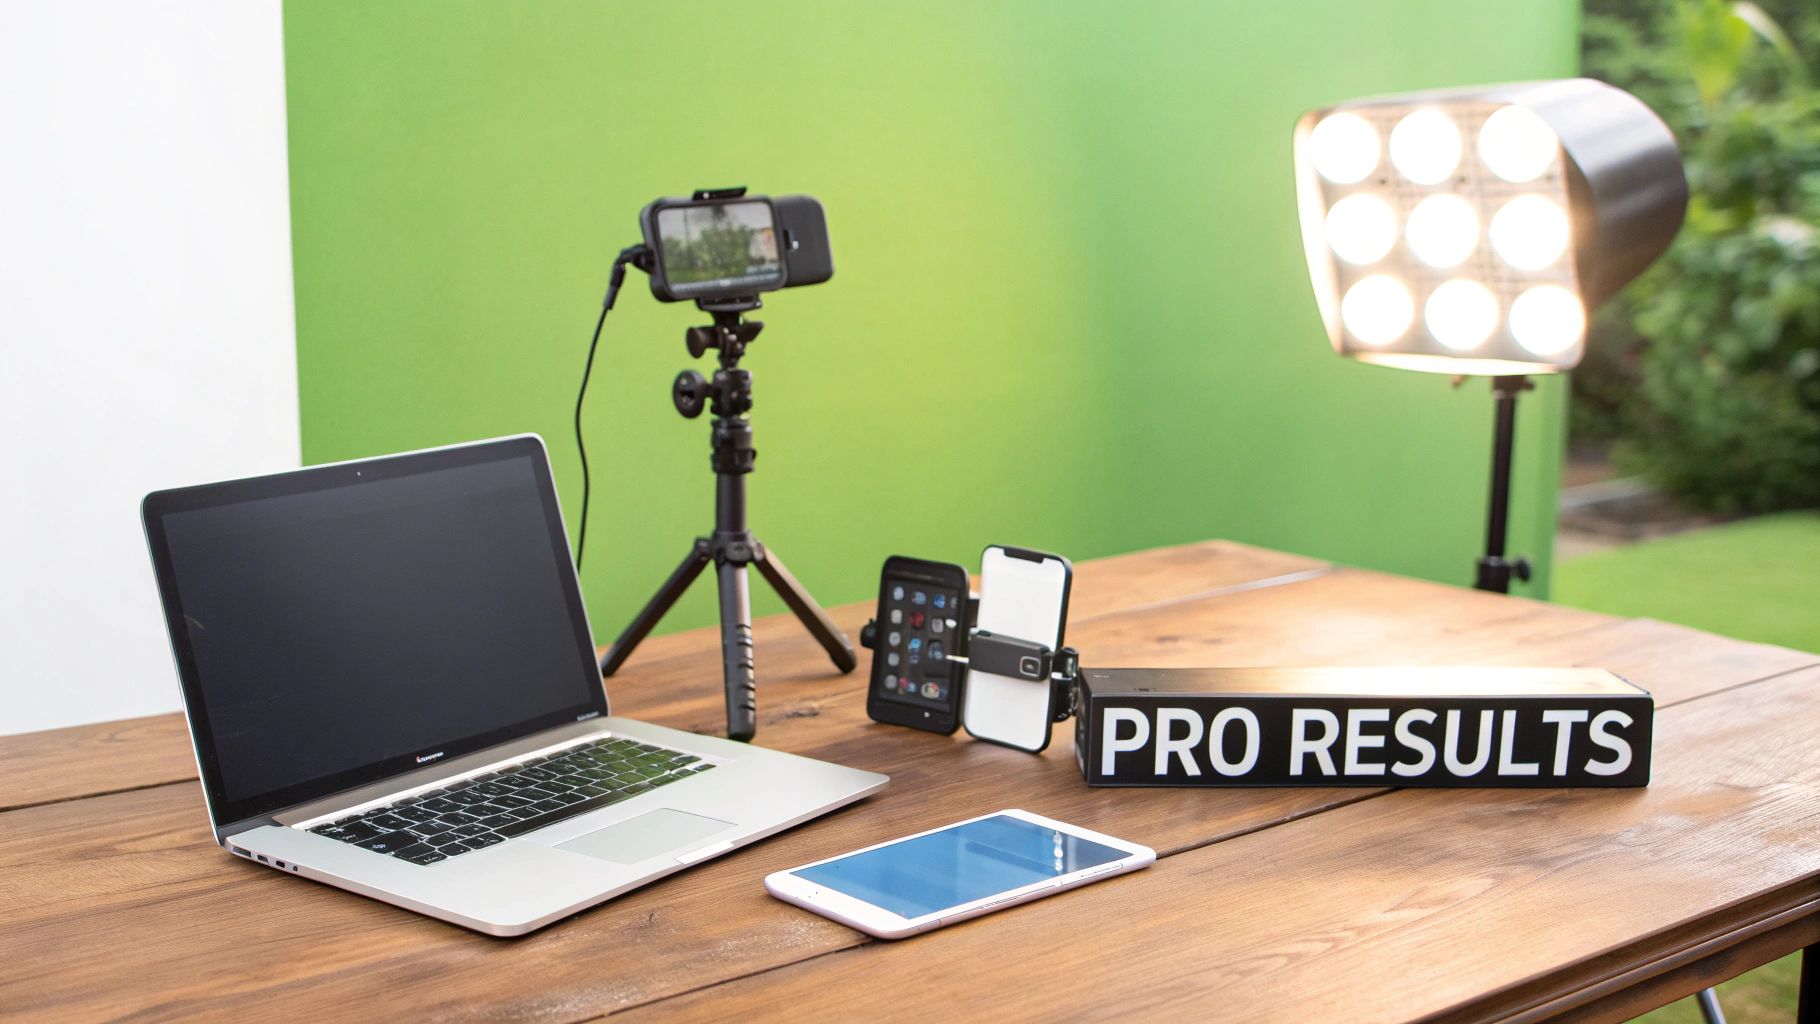
Getting Professional Results on a Budget
Producing training videos that have a polished, professional feel doesn't mean you need a Hollywood-sized budget. Honestly, the secret is just focusing on the fundamentals that make the biggest impact—clear audio and good lighting. With a few smart techniques and a minimal investment, you can create high-quality content that genuinely keeps your learners engaged.
Let’s be clear about one thing: poor audio is the fastest way to lose your audience. Viewers are surprisingly forgiving of video that isn't perfect, but if they can't hear you clearly, they’ll simply tune out. The built-in microphone on your laptop or webcam is notorious for picking up every echo and background hum, which is why an external microphone is your single most important investment.
A simple USB lapel microphone or a decent desktop mic can make a world of difference. An actionable tip: clip a lapel mic to your shirt collar, about 6-8 inches from your mouth, for consistent, clear sound. Just remember to do a quick test recording to check your sound levels before you dive into a full session.
Demystifying Three-Point Lighting
Good lighting is what separates amateur footage from a professional-looking recording. It gets rid of harsh shadows, adds depth to the shot, and makes the speaker look clear and approachable. The great news is you can achieve a classic three-point lighting setup without buying expensive studio gear.
This setup uses three light sources to illuminate your subject properly:
Key Light: This is your main, brightest light source, placed slightly off to one side of the camera. A practical example is facing a large window so the natural daylight illuminates your face.
Fill Light: Positioned on the opposite side, this softer light "fills in" the shadows created by the key light. A simple desk lamp with a lampshade to diffuse the light works wonderfully. Try bouncing the lamp's light off a white wall for even softer results.
Back Light: Placed behind you (and out of the shot), this light separates you from your background, preventing you from looking like a flat cut-out. Another small lamp pointing at the wall behind you will do the trick.
By simply arranging lights you already own, you can dramatically improve your video quality. The goal isn't to blast the subject with light but to create a balanced, natural look that is easy on the eyes.
Recording Your Screen and Webcam Together
For software tutorials or presentation walkthroughs, showing both your screen and your face at the same time is incredibly effective. It adds that human touch and really helps hold the viewer's attention. Most modern screen recording tools, including the recorder built into MEDIAL, make this unbelievably simple.
An actionable tip: before you hit record, close all unnecessary browser tabs and turn off notifications on your computer. A clean, uncluttered desktop helps learners focus on the task you're demonstrating, not on your personal emails popping up. This small detail helps learners focus on you and the content, not what’s happening behind you.
For more specific techniques for this style of recording, check out our guide on how to record a PowerPoint presentation with audio for some extra tips.
Live Streaming for On-Demand Content
Don't overlook the power of live streaming platforms for producing training videos. You can host a live training session for a group and simultaneously record it. Once the session is over, that recording becomes a valuable on-demand asset that you can use again and again.
Many platforms let you add your organisation's branding, like logos and colour schemes, directly to the stream. A practical insight: create a simple branded title card in a tool like Canva and display it for a few minutes before you go live. This adds a layer of professionalism and reinforces your brand identity. The recorded session can then be hosted securely on a platform like MEDIAL, ready for learners to access whenever they need it, creating a flexible and reusable training resource.
Using AI to Edit and Enhance Your Videos
So, you’ve finished recording. Great job! But that raw footage isn't quite ready for your learners yet. The magic really happens in post-production, where you shape those takes into a polished, professional, and genuinely useful training resource. This stage used to be a real bottleneck, often demanding complex software and hours of painstaking work, but that’s simply not the reality anymore.
Today, clever in-browser editors and AI-powered tools have made the whole process faster and far more approachable. You can now trim, cut, and polish your content without needing a degree in video engineering.
Streamlining Edits Directly in Your Browser
Forget about downloading and learning bulky, complicated software. Modern platforms like MEDIAL let you handle all the essential edits right from your web browser. For busy trainers and educators, this is a total game-changer.
The first pass is all about tightening things up. A practical editing workflow is to watch your video through once and simply use the "split" tool to mark the start and end of any mistakes or long pauses. Then, go back and delete all those marked sections in one go. This is far faster than trying to make perfect cuts on your first pass.
The most effective training videos respect the learner's time. A few simple cuts to remove dead air or a repeated point can be the difference between a video that feels sharp and one that drags.
The costs of post-production can add up quickly. In the UK, a professionally produced 2-3 minute corporate training video can cost anywhere from £2,000 to £10,000, depending on its complexity. Using intuitive, AI-assisted tools helps you get a handle on these costs by empowering you to do much of the work yourself.
Boosting Accessibility with AI-Powered Captions
One of the most powerful ways AI is changing video is through automated captioning. Manually transcribing a video is a slow, tedious job. With AI, you can generate accurate, time-coded captions in just a few minutes.
This isn't just a nice little extra; it's absolutely vital for accessibility and learning. Captions are a huge help for:
Learners with hearing impairments, giving them equal access to the material.
Non-native speakers, who can follow the text to reinforce their understanding.
Anyone in a noisy environment, letting them watch without needing sound.
All learners, frankly. Research shows captions can improve comprehension and help everyone retain information.
Most AI tools, including MEDIAL's, generate a transcript that you can quickly proofread and tweak for any small errors. An actionable tip is to focus your proofreading on proper nouns, acronyms, and industry-specific jargon, as these are the areas where AI is most likely to make mistakes. As you look into different technologies, it's worth exploring the range of powerful AI video tools available to find what works best for you.
Making Content Navigable with Chapters
For longer training videos covering multiple topics, a single timeline can be a real pain for learners. They might need to quickly find a specific bit of information without scrubbing back and forth through the whole video. This is where chapter markers are brilliant.
Chapters break your video into a logical table of contents. A learner can just click on a chapter title—like "Creating a New Project" or "Exporting Your Final Report"—and jump straight to that part.
An actionable insight: base your chapter titles on the key steps or learning objectives you defined in your plan. For example, if an objective was to "create a new sales opportunity," a chapter should be titled "Creating a New Sales Opportunity." This creates a clear, logical link between your plan and the final video. You can read more about MEDIAL's auto-chaptering capabilities to see how it works.
Finally, don't forget the simple touches that create a cohesive feel. Use your video platform to add a persistent logo or a branded intro and outro. These small additions reinforce your organisation's identity and give your entire library of training content a consistent, professional look.
Getting Your Video Seen and Measuring its Impact
Creating a brilliant training video is a huge achievement, but it's only half the battle. For it to truly succeed, your audience needs to see it, and you need to be able to prove it’s working. This is the final and most crucial step, where you deliver your content and gather the insights needed to refine your strategy down the line.
Getting your video in front of your learners should be a frictionless experience. The last thing you want is for them to struggle with clunky links or confusing platforms. This is where a seamless integration with your existing Learning Management System (LMS) becomes an absolute game-changer.
Seamlessly Integrating with Your LMS
Most modern video platforms, including MEDIAL, are built to work directly within the LMS environments you already use, like Moodle, Canvas, or Blackboard. This means you can embed your videos directly into a course page, making them a natural part of the learning flow.
This approach offers some serious advantages:
A Unified Learner Experience: Learners don't have to leave their familiar LMS environment to watch a video, which reduces friction and keeps them focused on the lesson.
Simplified Access: It uses the single sign-on (SSO) your institution already has in place, so there are no extra passwords for anyone to remember.
Centralised Content: All your training materials—videos, documents, quizzes—live in one organised space, which makes your course so much easier to navigate.
The goal is to make video feel like an integral part of the course, not a bolted-on afterthought. When a video is embedded right where it’s needed, it becomes a powerful, immediate learning tool rather than just another link to click.
Protecting Your Content with Secure Hosting
Let's be honest: your training content is valuable intellectual property. Leaving it unprotected on public video sites is a massive risk. Secure hosting is all about making sure that only your intended audience can access your materials.
Look for a platform that offers robust IP controls. A practical example is restricting access so that videos can only be played from within your office's IP range or via your company's secure VPN. This is non-negotiable for sensitive or proprietary training content and gives you complete peace of mind that your assets are protected.
Creating Active Learning with Video Assignments
One of the most effective ways to ensure learning has actually happened is to move learners from passive watching to active doing. Video assignments are a fantastic way to achieve this. Instead of just a standard multiple-choice quiz, you can ask learners to record themselves performing a task.
Just imagine these scenarios:
A sales trainee records a mock pitch to demonstrate their new skills.
A nursing student records themselves correctly performing a clinical procedure.
A software user shares their screen as they navigate a complex new feature.
This kind of assessment provides authentic proof of competence that a simple test never could. With tools that integrate right into your LMS, learners can easily record and submit their video responses, and you can provide targeted feedback directly on their submissions.
Diving into Analytics to Measure What Matters
So, how do you actually know if your video is effective? The answer is in the data. Analytics are your window into learner behaviour, showing you exactly what’s working and what isn’t. You've got to look beyond simple view counts and dig deeper into engagement metrics.
Here are the key data points to focus on:
Viewer Engagement: This shows you a second-by-second graph of viewership. An actionable insight: look for a big drop-off in the first 30 seconds. If you see one, your intro might be too slow. Look for a section that gets re-watched often; that's a perfect candidate to be turned into its own short microlearning video.
Completion Rates: Knowing what percentage of viewers watched the video all the way through is a powerful indicator of how engaging your content is. Low completion rates on a mandatory training video might mean it's too long or not relevant enough.
Individual User Data: In an LMS environment, you can often track which specific learners have watched which videos. This is essential for compliance training, where you need to confirm that every single person has completed the required material.
This data-driven approach is what separates good training from great training. The powerful impact of video is backed by research, which has shown that employees retain between 25% to 60% more information when training is delivered through video compared to text. You can read more about these video training findings and see why measuring its impact is so important. By analysing your video's performance, you gain actionable insights to improve future content, ensuring your efforts are always making a real difference.
Frequently Asked Questions
Even with a rock-solid plan, questions always pop up when you're in the thick of producing training videos. Here are a few of the most common ones we hear, along with some straight-talking answers to help you move forward with confidence.
How Long Should a Training Video Be?
Honestly, it's almost always shorter than you think. For a single, focused topic, the sweet spot is usually somewhere between three to seven minutes. This microlearning style respects people's time and, more importantly, makes it much more likely they'll actually remember what you've taught them.
A practical example: if you need to teach a 30-minute process, don't create one 30-minute video. Instead, break it down into a five-part series of six-minute videos, with each one covering a distinct step. This makes the content far more digestible and easy to revisit within your LMS.
What's the Most Important Element of a Good Training Video?
Without a moment's hesitation: clear audio. It is completely non-negotiable.
Your audience will forgive lighting that isn't perfect or camera work that's a bit shaky. What they won't tolerate is bad sound. If they have to strain to hear you, or if your voice is lost in a sea of echo and background noise, your training has failed before it’s even had a chance to start.
An actionable tip: before you record, find the quietest room you can and do a quick "clap test." Clap your hands loudly. If you hear a long, ringing echo, try hanging some blankets on the walls or recording in a room with more furniture to absorb the sound.
Viewers will abandon a video with poor audio quality much faster than one with poor video quality. If they have to strain to understand you, you've already lost their engagement.
How Can I Make My Training Videos More Engaging?
Engagement isn't about Hollywood-level production value. It’s about variety and interaction. The real trick is to move beyond the standard "talking head" video and give your learners different things to see, think about, and do.
Here are a few practical ways to bring your videos to life:
Vary Your Visuals: Don't just show your face for five minutes straight. Mix it up with screen recordings to demonstrate a process, pop in some simple text overlays to highlight key points, or switch between camera angles if you can. An easy trick is to zoom in slightly on your webcam footage after an important point to visually break up the shot.
Build in Interactivity: Passive viewing is the enemy of learning. Use a platform that lets you drop in quick in-video quizzes to check for understanding as they go. For example, after showing a software step, insert a multiple-choice question: "Which menu should you click to export your work?"
Prompt Active Learning: Ask reflective questions that get them thinking about how the content applies to their own work. Even better, create video assignments where they have to record themselves applying the skill you've just taught. This flips the script, turning them from passive viewers into active participants.
Ready to create, manage, and measure your own high-impact training videos? MEDIAL provides an all-in-one, AI-powered platform that integrates directly with your LMS to make producing training videos simpler and more effective. Schedule your free demo today!
Comments