How to Record a PowerPoint Presentation with Audio Like a Pro
- MEDIAL
- Dec 17, 2025
- 16 min read
Learning how to record a PowerPoint presentation with audio is surprisingly simple. You just need to find the built-in 'Record' feature, usually tucked away in the 'Slide Show' tab, to capture your voice and timings for each slide. For example, instead of just sending slides from a quarterly business update, you can record a 5-minute narrated summary, ensuring your key messages are heard exactly as you intended, transforming your static deck into a dynamic video presentation, ready to share with anyone, anywhere.
Why Preparation Matters for a Flawless Recording
Before you even think about hitting that record button, taking a moment to prepare can be the difference between a polished, professional video and one that's a distracting mess. A few minutes spent checking your setup will ensure your message lands clearly, without any technical gremlins or dodgy audio quality getting in the way. It’s all about creating the right environment for your content to shine.
This isn’t about splashing out on expensive gear. Instead, it’s about getting three key things right with practical actions:
Your Environment: Don't record at your desk in an open-plan office. Find a small meeting room or even a quiet room at home. Close the door and windows to minimise traffic noise or colleagues' conversations.
Your Equipment: Do a quick 10-second test recording. Say a few sentences and listen back. Is your voice clear? Is there a humming sound from your laptop fan? This simple check avoids discovering an issue after recording for 20 minutes.
Your Content: Instead of reading slides word-for-word, write down 3-4 bullet points for each slide in the 'Notes' section. This prompts you on what to say, helping your narration sound natural and not robotic.
By nailing these basics first, you’re setting yourself up for a much smoother recording session. You'll spend less time re-recording slides and more time creating something genuinely impactful.
Checking Your Hardware and Software
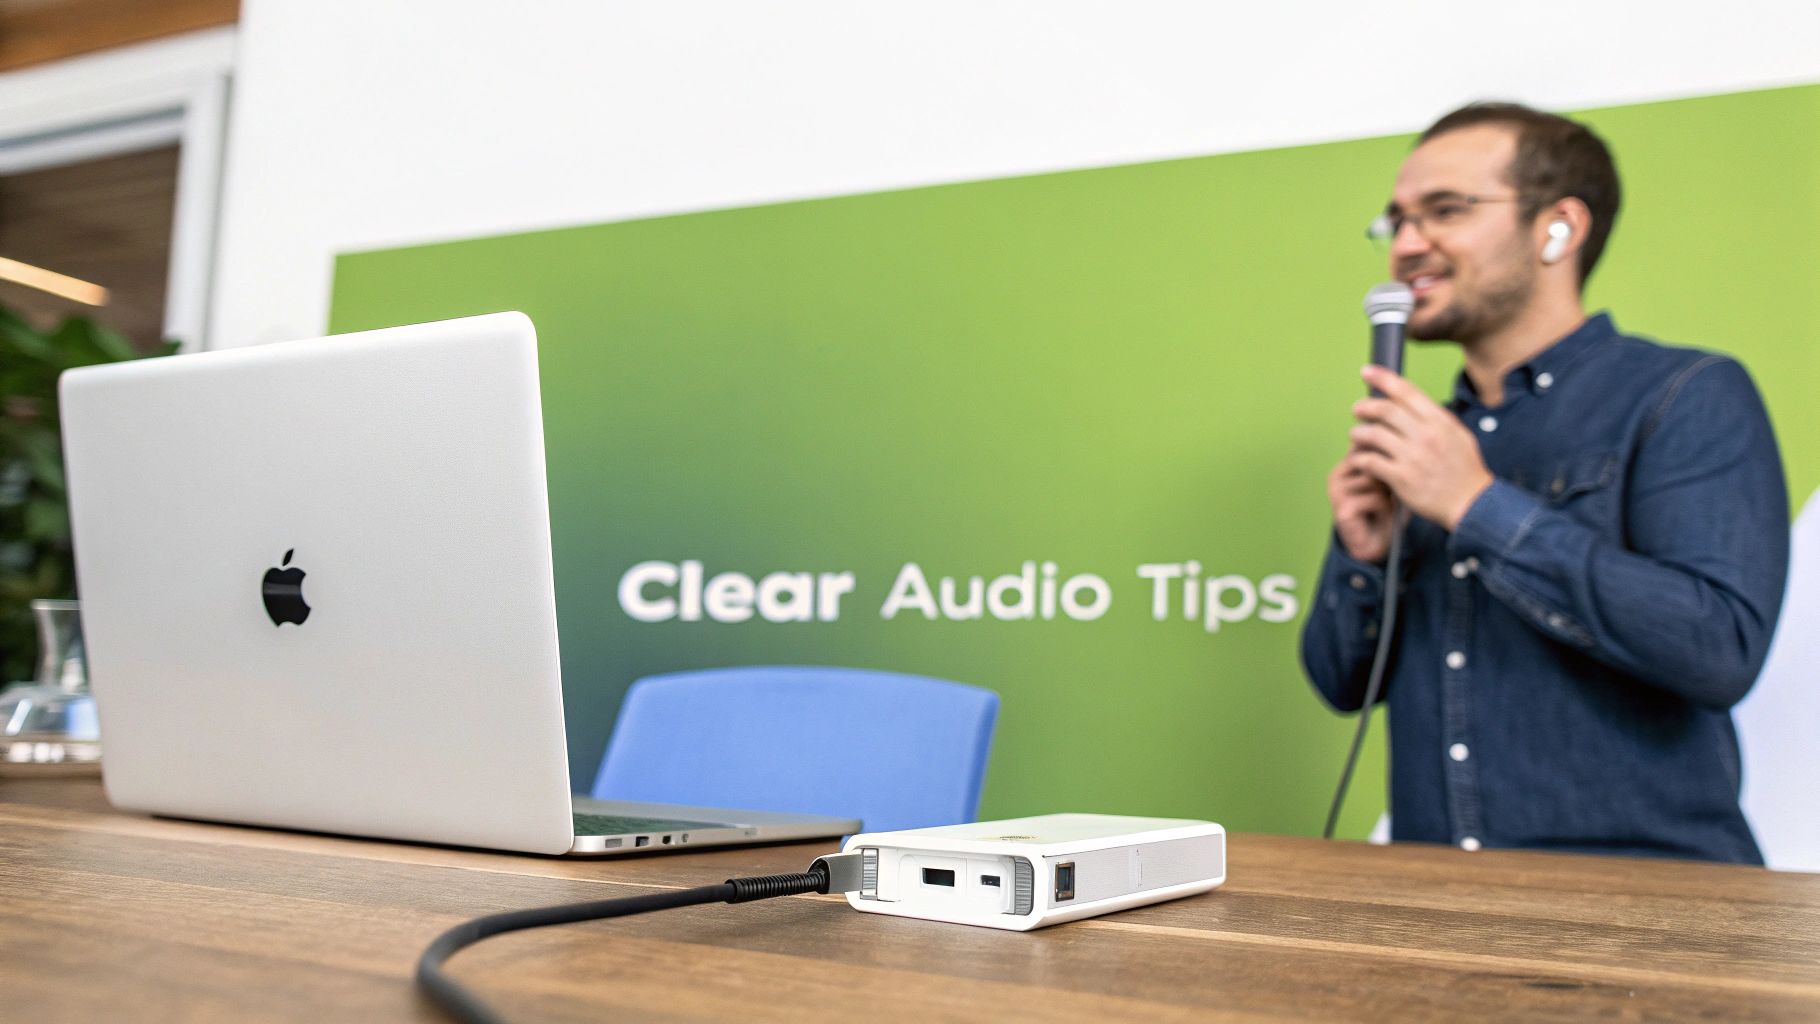
First things first, let's make sure your kit is up to the job. While your laptop's built-in microphone is handy in a pinch, an external USB microphone will give you a massive leap in audio quality. This simple upgrade can eliminate that tinny, distant sound that plagues so many recordings made with internal mics.
Here's a crucial takeaway: clear audio is non-negotiable. An audience will forgive so-so visuals, but they will switch off in a heartbeat if they can't understand you. For example, a £30-£50 USB microphone like a Blue Snowball or Audio-Technica AT2020 is one of the highest-impact, lowest-cost improvements you can possibly make.
A quick-glance comparison can help you decide what's best for your needs.
Recording Equipment Comparison Basic vs. Professional Setup
Equipment Type | Best For | Pros | Cons |
|---|---|---|---|
Built-in Laptop Mic | Quick, informal recordings where quality isn't critical. | It's free and always available. | Poor audio quality, picks up background noise. |
USB Microphone | Most users; excellent for tutorials, lectures, and professional presentations. | Significant audio quality boost, easy to use (plug-and-play). | A small investment is required. |
Headset with Mic | Online meetings, webinars, or when you need to be hands-free. | Good voice isolation, reduces background noise. | Can look a bit clunky on camera. |
Professional Studio Mic (XLR) | High-stakes presentations, professional course creation, or podcasting. | Broadcast-quality audio. | Requires an audio interface and technical knowledge. |
For most people, a simple USB microphone strikes the perfect balance between quality and cost. It's a small change that makes a huge difference.
Next up is your software. Check that your version of PowerPoint actually supports native recording. Most modern versions, including those in Microsoft 365, have this feature built right into the 'Record' or 'Slide Show' tab. If you're stuck on an older version that doesn't have it, don't panic. Free screen recording tools like OBS Studio or even QuickTime on a Mac are fantastic alternatives that can capture your screen and audio with ease.
The good news is that most of us in the UK are already well-equipped. As of 2023, with over 95% of UK households having internet access and affordable USB mics available everywhere, the technical hurdles are lower than ever. Given that PowerPoint is used by a staggering 85–89% of UK professionals to create presentations, its built-in recording tools are within easy reach for the vast majority of users. You can explore more about presentation trends in the UK to get a better sense of the landscape.
A Practical Guide to Recording on Any Device
Now that your setup is sorted, it’s time to get down to the nitty-gritty of creating your recording. While the core idea is always the same, the exact buttons and menus can vary a little depending on your device and which version of PowerPoint you’re running. Knowing your way around these small differences is key.
This guide will walk you through the process on the three most common platforms: the powerhouse desktop version for Windows, the sleek experience on a Mac, and the super-accessible PowerPoint for the web. Each path leads to the same destination—a polished, narrated presentation ready to be shared.
Recording Your Presentation in PowerPoint for Windows
The desktop version of PowerPoint on Windows really is the most feature-rich option out there. It’s the one to use if you want granular control over every aspect of your narration and any on-screen drawings or highlights you want to add.
To kick things off, open your presentation and head over to the Slide Show tab in the main ribbon. You’ll spot the Record button there. Clicking it launches a dedicated recording studio view, which is where all the action happens. This interface is cleverly designed to keep everything you need within easy reach, so you can focus on delivering your content.
This visual breaks down the simple prep work: double-check your software, find a quiet space, and get your microphone ready.
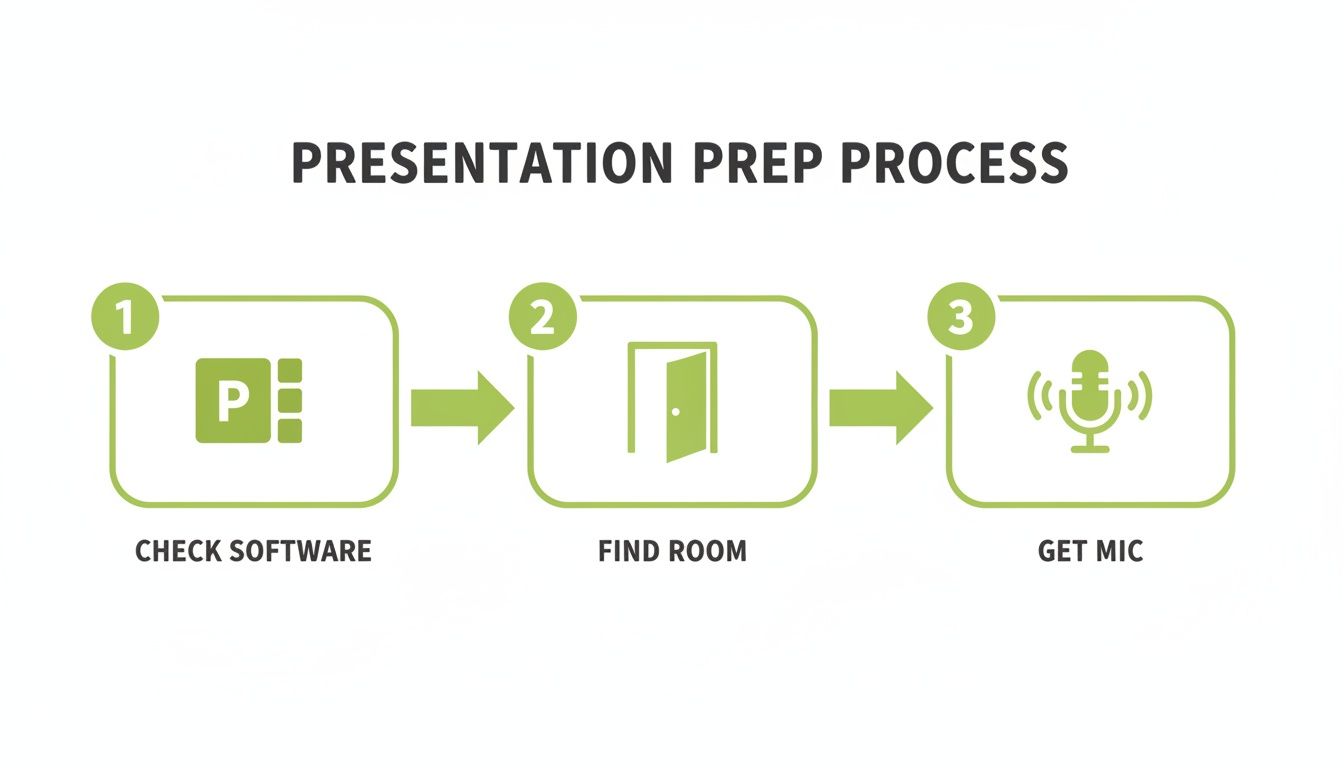
Running through this quick checklist ensures you've got the technical and environmental basics covered before you even think about hitting record.
Once you’re in the recording studio, you'll see your current slide displayed front and centre. Your speaker notes will be visible just below it (but don't worry, they won't show up in the final video). You'll also see a big red Record button in the top-left corner.
Insider Tip: I always recommend doing a quick test recording on a single slide first. Just record for 10-15 seconds, stop, and play it back. This simple check confirms your microphone is working and helps you get your audio levels right before you commit to the full presentation.
When you're ready to go, hit the record button. A countdown will give you a moment to compose yourself, and then you can start speaking. As you narrate, you can use the helpful annotation tools at the bottom of the screen.
Laser Pointer: Use this to draw your audience's eye to a specific data point on a chart as you explain its significance.
Pen and Highlighter: Perfect for circling a key term in a definition or underlining a critical deadline on a project timeline. These markings are saved as part of your recording.
You can advance through your slides using the arrows, just like in a live presentation. A great habit to get into is pausing for a second or two after you finish talking on one slide before moving to the next. This creates a clean audio break, making it much easier to re-record a single slide later if you fluff your lines.
Capturing Your Voiceover on a Mac
The process for recording on a Mac is just as straightforward, though the interface has that slightly different, cleaner aesthetic Apple is known for. The core functionality is identical, so you're not missing out on anything important.
Just like on Windows, you'll start by opening your presentation and clicking on the Slide Show tab. From there, select Record Slide Show. This will launch the presenter view, which is optimised perfectly for recording.
You’ll see a familiar set of tools. The record button is up top, and you can toggle your microphone and camera settings at the bottom. Before you begin, it’s always worth checking that the correct microphone is selected—especially if you have an external one plugged in. For instance, if you plugged in a USB mic, make sure PowerPoint hasn't defaulted back to the built-in MacBook microphone.
One small difference is that the annotation tools might look a bit different, but they work in exactly the same way. You still have access to pens, highlighters, and an eraser to help you visually emphasise your points. These annotations are timed with your narration, so they appear in the final video at the precise moment you drew them.
As you record, remember that each slide's audio is captured independently. This is a massive advantage. If you stumble over your words on slide five, you don’t need to start the whole presentation over. Just stop the recording, go back to slide five, and re-record the audio for that one slide. This slide-by-slide approach saves a huge amount of time and frustration.
Using PowerPoint for the Web
What if you don't have the desktop application installed? No problem at all. PowerPoint for the web, which is part of the Office 365 suite, now includes a surprisingly capable recording feature. This makes it accessible from any computer with an internet connection, like a library computer or a borrowed laptop.
To get started, simply open your presentation in your web browser. Go to the Slide Show tab and click on Record. If you see a dropdown menu, choose either Record from Current Slide or Record from Beginning.
Your browser will probably ask for permission to use your microphone and camera, so be sure to click Allow. The recording interface will then load up, and it looks very similar to the desktop versions. You’ll have controls to start, pause, and stop, along with a view of your upcoming slide and speaker notes.
While the web version is incredibly convenient, it may not have the full suite of annotation tools found in the desktop apps. But for a straightforward voiceover, it works perfectly. Many modern devices like tablets and smartphones can also be used for content creation; you can learn more by checking out our guide on producing content using an iOS device. This flexibility ensures you can create engaging presentations no matter where you are.
Techniques For Crystal-Clear Audio Narration
You can have the most stunning slides in the world, but if your narration is muffled, echoey, or peppered with distracting filler words, your audience will tune out in seconds. The secret to a professional-sounding presentation isn’t spending a fortune on equipment; it’s about mastering a few simple techniques that make a massive difference.
These tips focus on improving what your microphone picks up and how you deliver your narration. By paying a little attention to your environment, delivery, and structure, you can create audio that’s clear, engaging, and genuinely easy to follow.
Optimise Your Recording Environment
First things first: you need to tame your surroundings. Hard surfaces are the enemy of clean audio. Think windows, wooden floors, and bare walls—they all reflect sound waves, creating that distracting echo or reverb that makes recordings sound amateurish.
You don’t need a professional studio. A small room with plenty of soft furnishings is often your best bet. A bedroom with a carpet, curtains, and a duvet works beautifully because those materials absorb sound. As a practical example, try recording in a room with hardwood floors, then record the same line in a carpeted bedroom. The difference will be immediately obvious.
It's also crucial to eliminate background distractions. This part is non-negotiable. Close the windows to block traffic noise, turn off any fans or air conditioning, and silence your phone notifications. For a deeper dive into audio hygiene, you can find some excellent tips to help you reduce background noise in your microphone.
Master Your Microphone And Delivery
Once you've found a quiet spot, it's time to focus on your microphone technique and speaking style. How you speak into the mic is just as important as the mic itself.
Even if you’re just using your laptop's built-in microphone, you can improve the quality. Try propping your laptop on a stack of books so the microphone is closer to your mouth and not pointing at your chest. If you're using an external mic, aim for a distance of about 6-8 inches from your mouth. This is the sweet spot for capturing a rich vocal tone without picking up harsh "plosives"—those popping sounds from 'p' and 'b' words.
Crafting a simple script or even just a set of bullet points is a game-changer. It stops you from rambling and cuts out all the verbal clutter like "um," "ah," and "you know." You'll sound more confident, and trust me, your recording process will be significantly faster.
Your delivery plays a huge part, too. Here are a few practical tips:
Pace Yourself: Speak slightly slower than you would in a normal conversation. It makes you easier to understand and gives your words more impact. Try reading a sentence at your normal pace, then reading it again as if you were explaining it to someone carefully. That's the pace to aim for.
Stay Hydrated: Keep a glass of water nearby. A dry mouth can cause audible clicks that are surprisingly distracting for listeners.
Warm-Up: Before you hit record, just read a paragraph from a book or an article out loud. It really helps get your voice ready.
You can learn more about the specific tools for this process in our guide to choosing an elearning video audio recorder.
Structure Your Recording For Engagement
Finally, let’s talk about structure. How you organise your recording can have a huge effect on how much your audience actually retains. Trying to record a 45-minute presentation in one marathon session is a recipe for fatigue and mistakes. Instead, think in smaller, more digestible chunks.
Break your presentation into logical sections and record them separately. For instance, if you have a 30-slide presentation, you could break it into three 10-slide recordings: 'Part 1: Introduction', 'Part 2: The Core Data', and 'Part 3: Conclusions'. Not only does this make the recording process feel less daunting, but it also aligns with how people naturally consume online content.
UK and international learning design guidance often suggests keeping recorded presentations to 10–15 minutes per segment. This is because viewer attention typically takes a nosedive after the 10-minute mark. In fact, analytics from corporate platforms in the UK show that viewer retention can jump by 20–40% for narrated videos compared to static slide decks. It’s a powerful strategy that’s well worth adopting.
Editing and Exporting Your Presentation as a Video
So, you’ve narrated your final slide. Great! But you’re not quite at the finish line yet. That raw recording is done, but a few final steps will turn it from a simple slideshow into a polished, professional video asset that you can share with confidence.
This is the part where we refine things. It’s about making a few smart edits, choosing the right export settings, and making sure your content is accessible to every single viewer. Taking the time to do this properly is what separates a decent recording from a truly durable and effective educational resource.
The Most Valuable Editing Trick: Re-recording a Single Slide
We've all been there. You're in the zone, narrating perfectly, and then on slide 12, you either trip over a word or the dog decides to start barking right outside your window. The old way of thinking meant a heavy sigh, deleting the whole thing, and starting right back at the beginning.
Thankfully, those days are long gone.
Because PowerPoint records the audio and timings on a slide-by-slide basis, you can easily fix a mistake on one slide without touching the rest of your presentation. This is, without a doubt, the single most important time-saving feature in the entire recording process.
Here’s the step-by-step action plan:
Navigate to the slide that has the mistake (e.g., slide 12).
Go to the Slide Show tab and click Record.
From the little dropdown menu, choose From Current Slide.
The recording screen will pop up. Record your new, correct narration for just that slide.
When you’re happy with the new take, just hit Stop and close the recording view.
Just like that, your new, corrected audio slots perfectly into the presentation, replacing the old version. This granular control means you can relax and be more natural when recording, knowing any little slip-ups can be fixed in seconds.
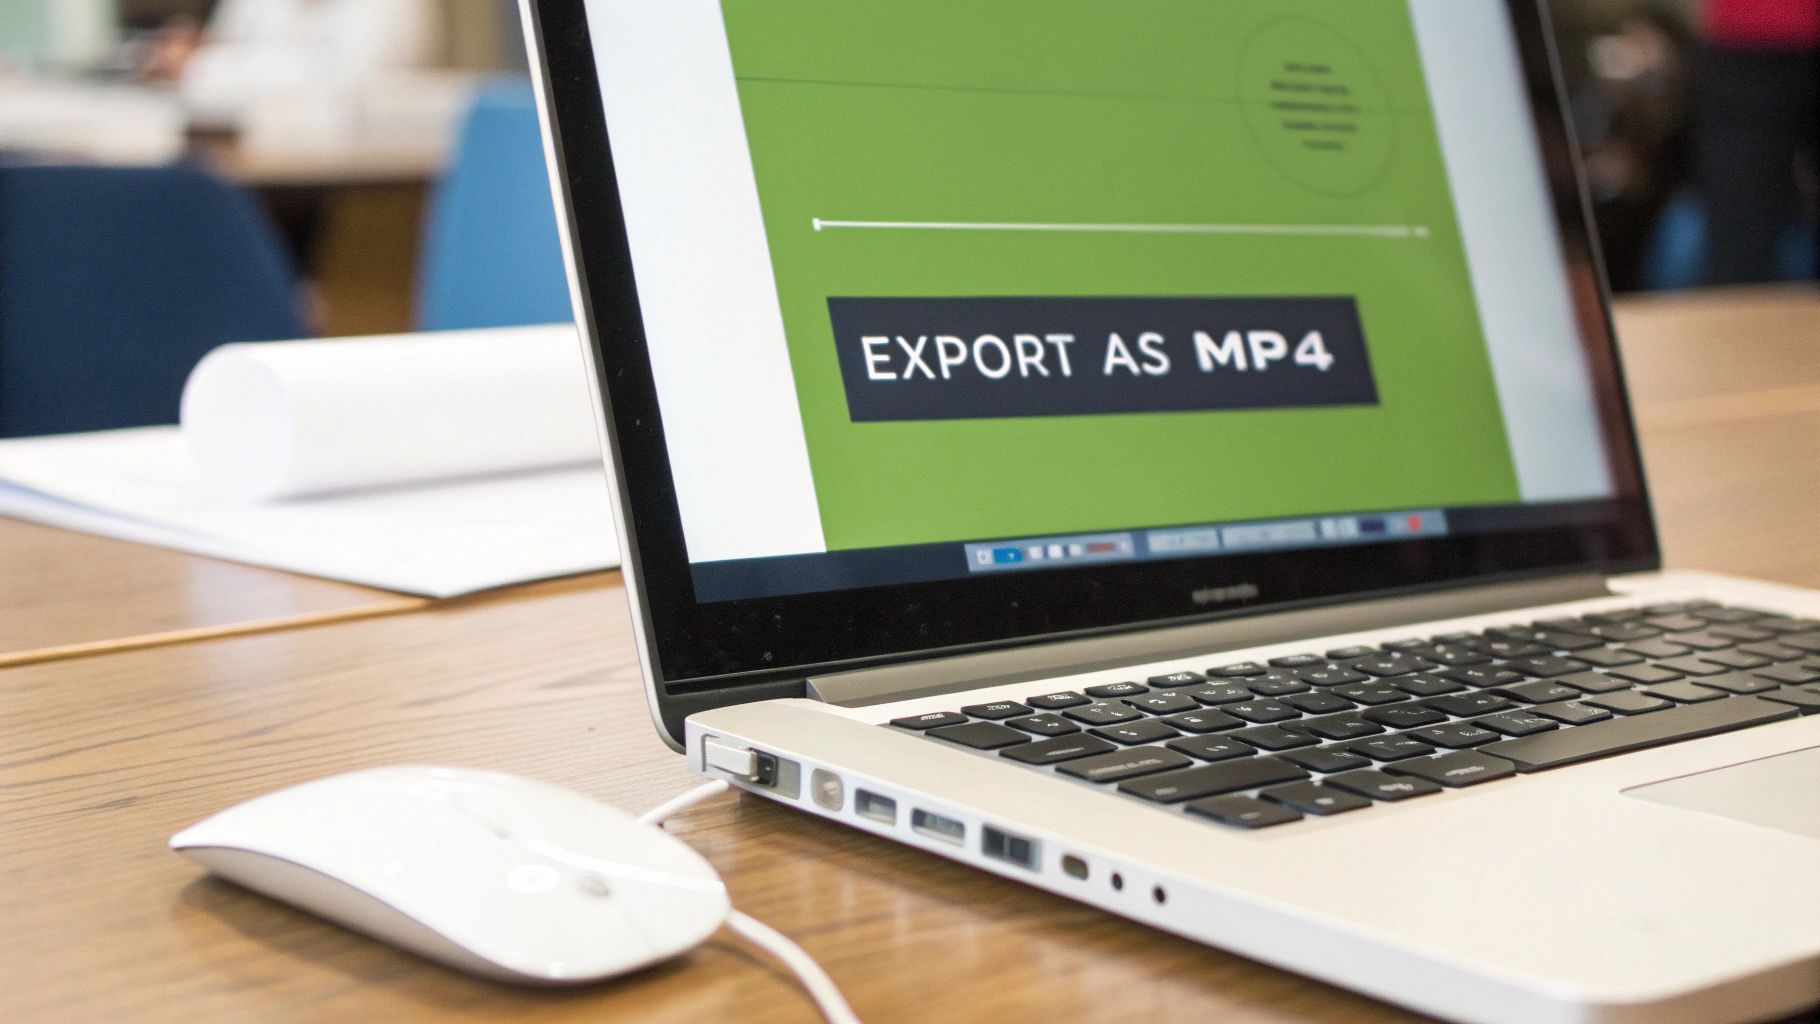
Exporting Your Presentation as a High-Quality Video
With your narration perfected, the final job is to convert your PowerPoint file into a standard video format. The universal choice here is MP4—it’s a versatile file type that works on pretty much every device, platform, and Learning Management System (LMS) out there.
To kick things off, go to File > Export > Create a Video. This opens a panel with a couple of important settings you’ll need to look at before creating your file. This screen is your final checkpoint, where you select the video quality and double-check that your timings and narrations are included.
The most critical decision you'll make here is about video quality. You'll usually see a few options, but the main two to think about are:
Full HD (1080p): Creates a large file, best for high-detail visuals on large screens. A 10-minute presentation could easily be 200MB or more.
HD (720p): Offers excellent quality with a much more manageable file size. The same 10-minute presentation might only be 80-100MB.
For most educational and corporate training, HD (720p) is the way to go. The file size is significantly smaller, which means faster uploads to your LMS or video platform and quicker downloads for your viewers—all without any noticeable drop in clarity for typical slide content.
Once you’ve picked your quality, make sure the "Use Recorded Timings and Narrations" option is selected. Then, just click "Create Video," pick a spot to save your file, and let PowerPoint do its thing.
Adding Captions for Better Accessibility
In any modern learning environment, accessibility isn't just a "nice-to-have"—it's a must. Adding captions to your video ensures your message reaches everyone, including individuals who are deaf or hard of hearing, and even people watching in a loud place or with the sound off.
Happily, this is now incredibly easy. Once your video is exported, you can simply upload it to a modern video platform to handle the captioning.
Upload your finished MP4 video file to a platform like MEDIAL or even YouTube.
These systems often use AI to generate a first draft of your captions automatically.
The platform transcribes all the audio from your video for you in a matter of minutes.
You can then quickly review and edit the auto-generated text to fix any mistakes (like names or technical terms) before you publish.
This simple process makes your video presentation inclusive and helps it meet accessibility standards. If you’re looking for a good place to host and manage your final videos, you might want to look into the options for video editing with MEDIAL, which fits perfectly into this workflow.
How to Share and Distribute Your Video Presentation

You’ve done the hard work and your polished MP4 video file is ready to go. Now for the final, crucial step: getting it in front of the right people. How you share your recorded presentation has a huge impact on who sees it and how they engage with it.
This isn’t just about attaching a file to an email. It’s about picking a distribution strategy that actually fits your goal, whether you’re delivering a university lecture, rolling out corporate training, or just sharing your knowledge with the world.
Choosing the Right Platform for Your Audience
First things first, ask yourself: where is my audience? For most people in education and corporate training, the answer is a Learning Management System (LMS) or a dedicated video portal. These platforms are purpose-built for secure, organised content delivery.
If you’re an educator, this almost always means uploading directly into your institution’s system. You’ll likely be working with one of the big names:
Moodle: A hugely popular open-source VLE (Virtual Learning Environment) used across UK universities.
Canvas: Known for its slick, modern user interface and great integrations.
Blackboard: A long-standing, feature-rich platform in higher education.
D2L Brightspace: Another major player with a focus on creating personalised learning paths.
Uploading your MP4 into your course page on one of these systems keeps the content secure and makes it dead simple for students to find. This approach is now standard practice. A 2021 survey found that a staggering 84% of UK universities made lecture recordings routinely available to students, a trend that's only grown since.
For corporate trainers, the workflow is pretty much the same. You'll probably be using a corporate LMS or a specialised video platform like MEDIAL, which is designed to handle video assets securely and efficiently.
The Pros and Cons of Different Sharing Methods
While an LMS is often the default choice, it’s not your only option. Depending on your needs, you might want to look elsewhere. Let’s break down the most common methods.
Sharing Method | Best For | Pros | Cons |
|---|---|---|---|
LMS/VLE Upload | Internal audiences like students or employees. | Secure, tracks completion, keeps content centralised. | Limited public access, can have file size limits. |
Video Platform (Vimeo, MEDIAL) | Both internal and public audiences needing extra features. | Excellent analytics, branding control, no ads. | Can involve a subscription cost for premium features. |
YouTube | Public-facing content meant for a wide audience. | Massive reach, free to use, powerful search. | Ads, less control over branding, potential privacy issues. |
Direct Email/File Share | Sending to a few specific people. | Quick and simple for small files and small audiences. | No analytics, large files are a pain, doesn't scale well. |
The key takeaway here is to match the platform to your purpose. For a private training module, a secure LMS is the obvious choice. But for a public tutorial you want the world to see, YouTube or a public-facing video platform is a much better fit.
Practical Steps for Uploading and Sharing
Once your presentation is good to go, it's time to use platforms and tools that offer efficient sharing and export options to get it to your audience. Thankfully, the actual upload process is usually very straightforward.
Inside your LMS or video platform, you’ll look for a button that says something like "Add an activity or resource," "Upload Media," or simply "Create." From there, you just need to select your MP4 file. The system will handle all the processing. Once it's finished, you can add a title and description and tweak any privacy settings.
For instance, in Moodle, a common way to do this is by adding a "MEDIAL Video Resource" to your course section. This lets you upload your presentation directly or pick it from your personal media library. That kind of integration keeps everything tidy and gives your learners a seamless experience without them ever having to leave the course page.
Common Questions About Recording in PowerPoint
Even with a great guide, it's natural to have a few questions about the little details when you're recording a PowerPoint. We get it. Let's tackle some of the most common ones we hear to help you wrap up your project with confidence.
Can I Edit the Audio After Recording It in PowerPoint?
The short answer is no, not really. Direct audio editing inside PowerPoint is incredibly basic. You can easily re-record the narration for an entire slide if you mess up, but you can't go in and trim out a cough or a long pause. For each slide, it’s pretty much an all-or-nothing deal.
If you really need to make precise edits, your best bet is to use a separate audio editor. A fantastic free tool for this is Audacity. Honestly though, for most people, simply re-recording the narration for that one slide is the quickest and easiest fix.
Why Is My Exported Video File So Large?
The final size of your MP4 video usually comes down to three things: resolution, how long the presentation is, and how complex your slides are. When you export, PowerPoint offers quality options like Full HD (1080p), HD (720p), and Standard (480p).
A higher resolution always means a bigger file. If you want to shrink your video's file size without a noticeable drop in quality, choosing HD (720p) instead of Full HD is often the sweet spot. A 10-minute 1080p video might be 200MB, while the same video at 720p could be under 100MB, making for much faster uploads and downloads.
Keep in mind, too, that high-resolution images or videos embedded in your slides will naturally inflate the final file size. A good habit is to compress your images before adding them to your presentation; it can make a surprising difference.
What Happens to My Animations and Transitions?
This is where PowerPoint really shines. The recording feature is designed to work perfectly with all your animations and transitions. It doesn't just record your voice; it captures the precise timing of when you click to trigger each effect.
As you narrate, you’ll advance through your animations just like you would in a live presentation. For example, if you have three bullet points that appear one by one on a mouse click, your recording will capture each click. When someone watches your exported video, those bullet points will appear in perfect sync with your voiceover, exactly when you clicked them.
Ready to manage, host, and share your recorded presentations securely within your organisation's LMS? MEDIAL offers a robust AI-powered video platform designed for education and corporate training. Learn how you can streamline your video workflow and enhance your teaching by exploring our solutions at https://medial.com.