A Practical Guide to Hosting Your Next Live Stream Event in an LMS
- MEDIAL

- Jan 16
- 17 min read
A live stream isn’t just a broadcast; it’s a real-time, shared experience for your audience. Unlike polished, pre-recorded videos, these live sessions create an immediate connection and a powerful sense of community, which is why they’ve become such an essential tool for modern education.
Why Live Streaming Is a Game Changer for Education
Moving beyond static, on-demand content, a live stream transforms learning from a passive activity into an active, shared moment. The real magic is in its immediacy. When an instructor is right there, in the moment, it builds a direct, personal connection that a pre-recorded video just can't match.
For example, imagine a university lecturer hosting a live review session before a major exam. Instead of just re-watching old lectures, students can ask specific questions about complex topics and get immediate clarification. This direct link is what creates a genuine sense of community. That back-and-forth is proven to help learners retain information and feel much more satisfied with the experience.
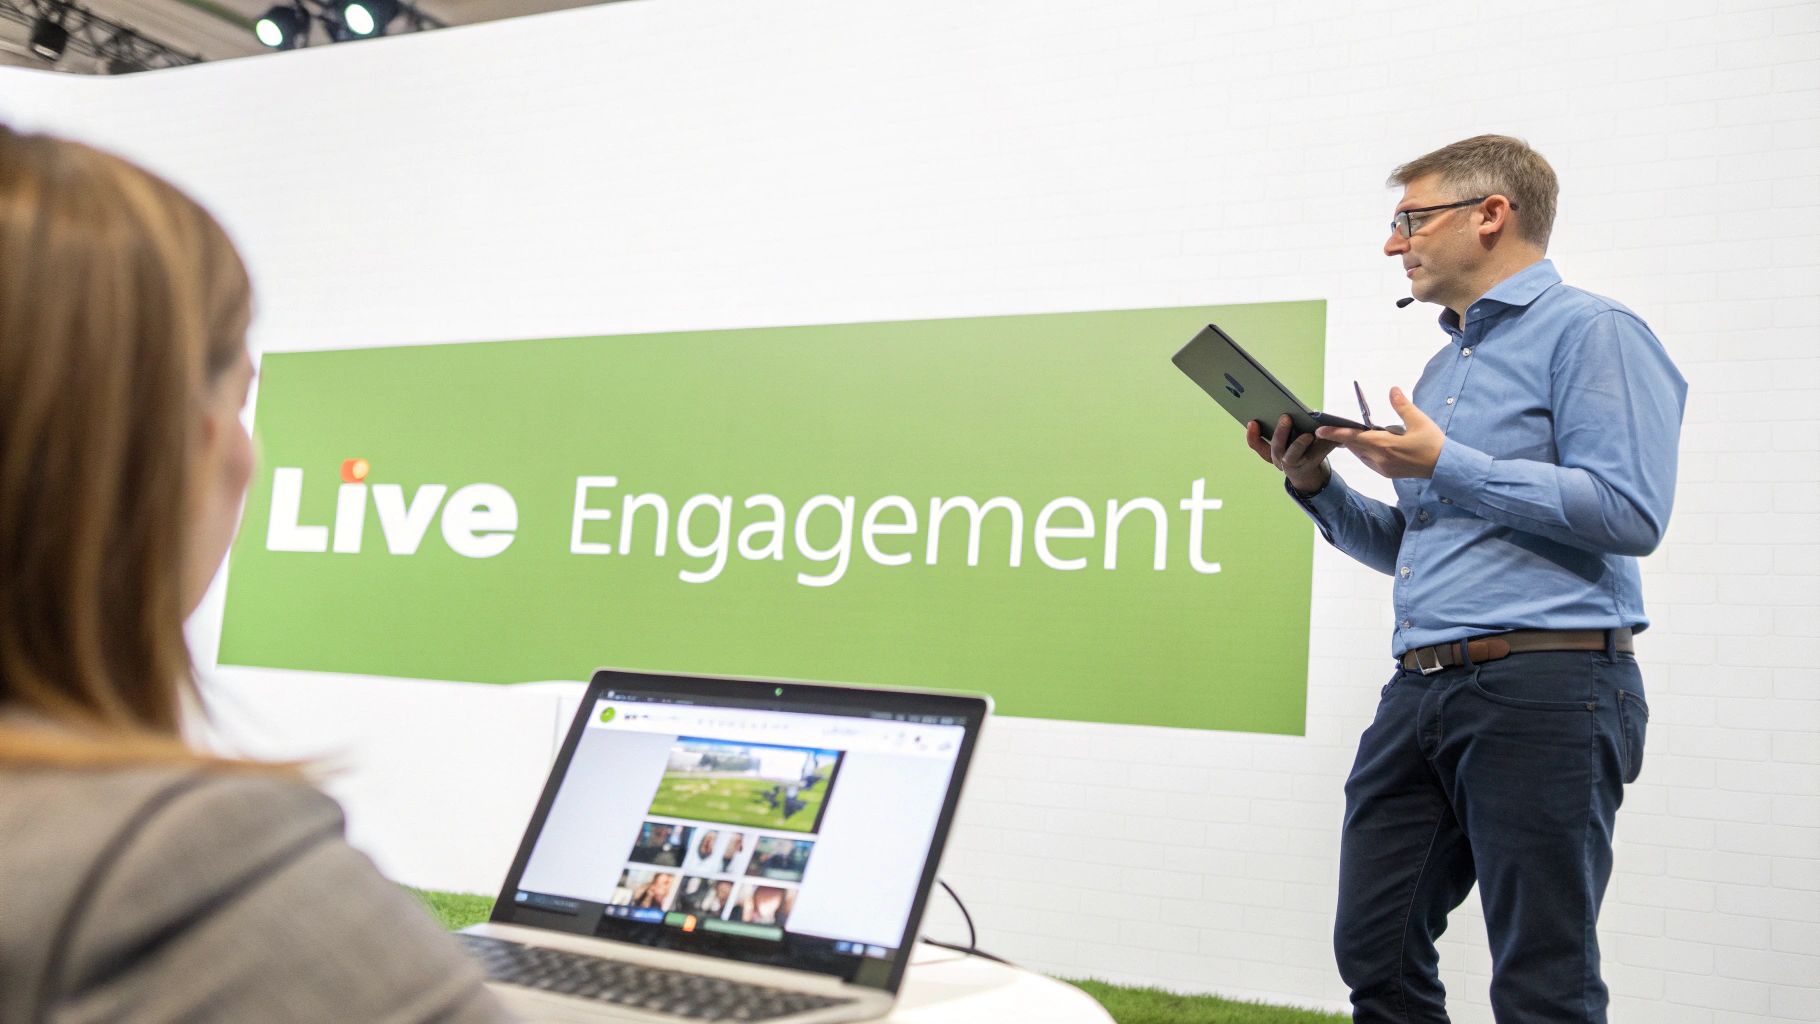
Fostering Genuine Engagement and Interaction
The biggest advantage of hosting a live stream is the ability to get invaluable, real-time feedback. You’re no longer just talking at your audience; you’re starting a dialogue with them.
For instance, a corporate trainer running a skills workshop can use live polls to quickly check everyone’s understanding of a new software feature. If the results show 70% of attendees are confused about "pivot tables," they can immediately circle back with another example. This kind of agility ensures your learning objectives are actually being met.
Here’s what really makes a difference:
Immediate Connection: Learners feel more connected when they can ask a question in the chat and hear the instructor address it by name seconds later.
Real-Time Feedback: Use a live poll to ask, "On a scale of 1-5, how confident are you with this concept?" to instantly gauge understanding and adjust your teaching pace.
Increased Accountability: A scheduled live event creates a sense of occasion. It encourages learners to show up prepared and focused, just like an in-person class.
The ability to interact directly with an audience during a broadcast is what separates a simple webcast from a truly engaging educational experience. It’s the difference between watching a documentary and participating in a live Q&A with the director.
Building Momentum and Lasting Value
A live stream is also a fantastic way to build momentum around a course or training programme. Promoting an upcoming live session with a guest speaker builds anticipation and encourages learners to dive into any prep materials you’ve shared in their LMS.
If you're new to this format, getting a handle on the basics can set you up for success. You can learn more about the topic by checking out what is webcasting explained tips for live streaming.
Ultimately, mastering the live stream isn't a novelty anymore. It's a fundamental part of delivering modern, impactful learning experiences that truly connect with today's students and trainees.
Strategic Planning for Your Live Stream Event
A powerful live stream event starts with thoughtful planning, long before you even think about hitting the ‘Go Live’ button. This isn't just about ticking boxes; it’s about laying a strategic foundation within your LMS that makes sure your session is engaging, purposeful, and runs without a hitch.
Every decision you make now directly shapes the learning experience later on. For instance, choosing to host a panel discussion instead of a lecture requires planning for multiple speakers and a moderator. This early phase is where success is made. A well-planned event feels effortless to the audience, but that seamlessness is always the result of meticulous prep work.
Defining Clear Learning Objectives
Before you plan any content, you need to answer one critical question: What should your audience be able to do after the event is over? Vague goals like "understand the topic" just won't cut it. You need sharp, action-oriented objectives to guide every other part of your planning.
Think about it in practical terms:
For a software training session: "After this live stream, participants will be able to successfully create and export a report using the new analytics dashboard."
For an academic lecture: "By the end of this event, students will be able to articulate three key differences between two competing historical theories."
For a skills workshop: "Participants will leave this session able to apply the 'STAR' method to answer behavioural interview questions."
Objectives like these become your content blueprint. For the software training example, your agenda must include a live demonstration of the dashboard, a walkthrough of the export function, and a Q&A segment to troubleshoot common issues. This approach is fundamental to creating focused and effective educational material.
Know Your Audience and Choose the Right Format
Your Learning Management System is a goldmine of information about your audience. Are they first-year university students who prefer interactive, bite-sized content? Or are they experienced professionals who need a deep-dive technical demonstration? Look at past course engagement data in your LMS—if short, 10-minute videos get high completion rates, a long, two-hour lecture might not be the best choice.
This understanding is what helps you pick the perfect format for your live stream.
Interactive Workshop: Best for hands-on skills. For example, a coding bootcamp could use breakout rooms for paired programming exercises.
Expert Q&A or Panel Discussion: Ideal for exploring complex topics. A business school could host a panel of local entrepreneurs to discuss market trends, with a moderator feeding questions from the student chat.
Live Lecture or Demonstration: Perfect for foundational knowledge. A chemistry professor could demonstrate a complex titration process live, allowing students to see the procedure up close and ask questions as it happens.
This simple process flow shows how a live stream can nurture the journey from initial engagement all the way to valuable feedback.When you focus on engagement first, you naturally build a sense of community. That, in turn, encourages participants to give you the real-time feedback that makes live events so incredibly powerful.
Scheduling and Promotion Within Your LMS
Once you've nailed down the 'what' and 'who', it's time for the 'when' and 'how'. Scheduling your event at a time that actually works for your audience is crucial. Don't guess—send out a quick poll through your LMS with three potential time slots and let your learners vote.
Then, you need to get the word out using your LMS's built-in tools. Don't just send an email and hope for the best.
Create an LMS Announcement: Post a clear, compelling announcement with the event title, date, time, and a short, snappy description of what attendees will learn. For example: "Live Event: Master Excel Pivot Tables. Join us this Friday at 2 PM to learn three expert tricks."
Set Up Direct Registration: Use your LMS's calendar or event feature so students can register directly. This adds it to their calendar and sends automatic reminders 24 hours and 1 hour before the event.
Share Teaser Content: A week before, post a one-minute "trailer" video or a challenging question in the course forum to start building buzz. For example: "Next week, we'll solve this exact problem. How would you approach it?"
To help you stay organised, we've put together a simple checklist to guide you through these initial steps.
Live Stream Event Planning Checklist
This checklist covers the essential pre-event planning stages, making sure you've got all your bases covered before you go live.
Planning Phase | Key Action | Example/Tip |
|---|---|---|
Objectives | Define clear, action-oriented learning outcomes. | Instead of "learn about marketing," use "create a basic social media content calendar." |
Audience | Analyse LMS data to understand learner needs and preferences. | Check past engagement metrics to see what content formats have performed well. |
Format | Select a live stream format that matches your objectives and audience. | For a complex topic, a Q&A with an expert guest can be more engaging than a straight lecture. |
Content | Outline the key topics, activities, and resources you'll use. | Prepare your slides, poll questions, and any links you plan to share in advance. |
Scheduling | Choose a date and time with maximum audience availability. | Use a tool like Doodle or an LMS poll to survey your learners for the best time. |
Promotion | Create a promotion plan using LMS announcements and forums. | Schedule at least three announcements: two weeks out, one week out, and the day before. |
Following these steps methodically will put you in a great position for a successful event. It turns planning from a chore into a strategic part of the process.
Nailing Your Tech Setup and LMS Integration
Let's be honest, the technical side of planning a live stream event can feel like the most daunting part. But you can make it much more manageable by breaking it down into a few key steps. The aim here isn't just about getting a signal out; it's about creating a solid, professional-quality stream that hooks directly into your Learning Management System (LMS).
That direct integration is the secret sauce for a simpler workflow. Instead of jumping between different platforms, you can run everything from one place, whether you’re on Moodle, Canvas, or Blackboard. This doesn't just save you a ton of time—it also automatically takes care of one of the biggest headaches in educational streaming: security.
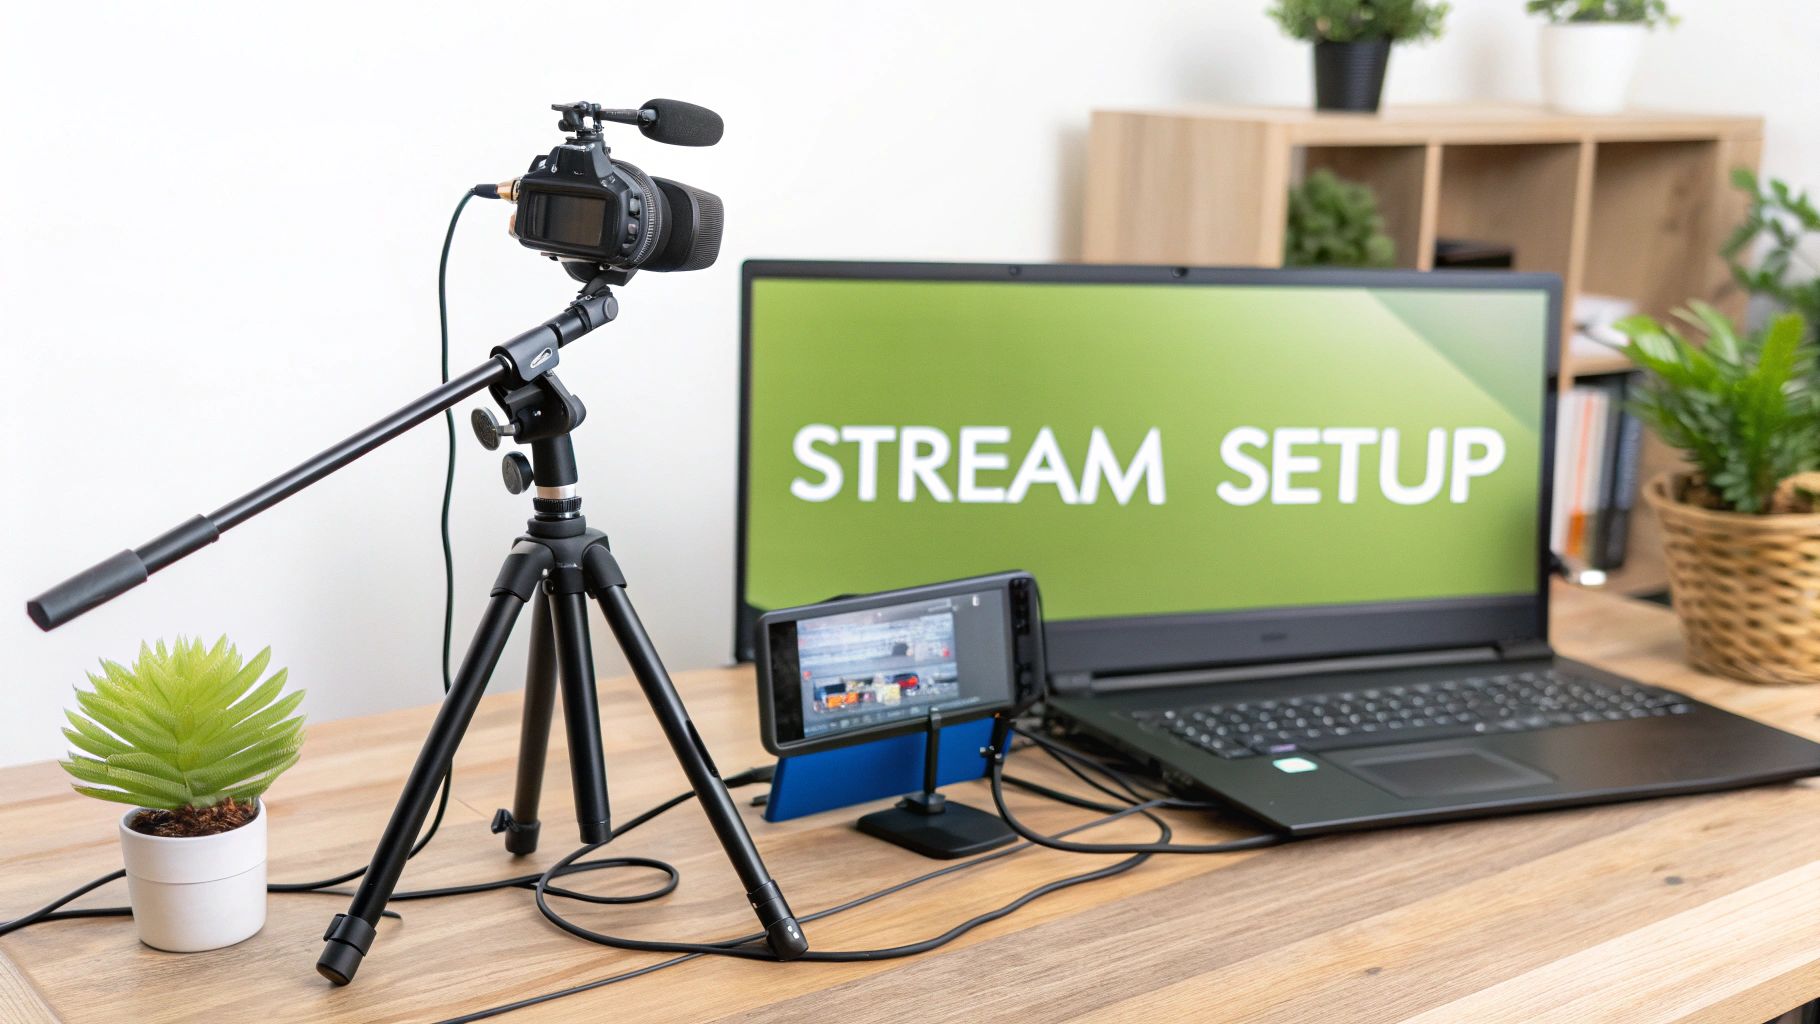
Choosing Your Core Equipment
You really don't need a Hollywood-level budget to get great audio and video. The focus should be on clarity and reliability, which all comes down to two things: your camera and your microphone.
For most classroom or lecture settings, a high-quality webcam like the Logitech C920 or even a mirrorless camera with a clean HDMI out will give you sharp, clear video. But the real game-changer is your audio. Your audience will probably forgive video that’s a little soft, but they will click away in a heartbeat if the audio is tinny and hard to hear.
Here are a couple of practical options to consider:
USB Microphones: Something like a Blue Yeti or Rode NT-USB+ is a fantastic starting point. They're plug-and-play, sit right on your desk, and deliver a rich, clear sound that’s a massive step up from any built-in laptop mic.
Lavalier Microphones: If you plan on moving around or using a whiteboard, a simple lavalier (or lapel) mic is a must-have. It just clips onto your shirt and keeps your voice level consistent, no matter where you are in the frame.
A classic rookie mistake is splashing out on a fancy camera while completely forgetting about the microphone. Always remember: if your audience can't hear you clearly, your message is lost, no matter how good you look on screen.
Configuring Your Stream Within the LMS
Once your gear is sorted, it's time to connect it all to your LMS. This is where a platform like MEDIAL really shines, acting as the bridge between your camera and your course modules. The process is as simple as embedding the live stream player directly onto a page or into an assignment within your course.
For example, in Moodle, you can add the MEDIAL activity to a course section. This creates a dedicated spot where students go to watch the stream live. From there, you can give the stream a title like "Week 4 Live Q&A," set the start time, and even pop in a custom thumbnail to match your institution's branding.
This embedded approach is miles better than just emailing out a public YouTube or Vimeo link. By keeping the stream inside the LMS, you automatically use its built-in security. This means only students enrolled in that specific course can get in, protecting your content without you having to lift a finger. If you want to dive deeper into this, we’ve put together a handy guide on mastering Learning Management System integration.
Encoder Settings for a Professional Broadcast
The final piece of the technical puzzle is your encoder. This is the software (like the free and incredibly powerful OBS Studio) or hardware that takes the feed from your camera and mic and sends it off to your streaming platform. For a smooth, buffer-free broadcast, you'll want to pay attention to a few key settings.
Essential Encoder Configurations
Bitrate: This controls your video quality. For a 1080p stream, aiming for a video bitrate between 4,500 and 6,000 kbps is a great target for clear, smooth motion.
Resolution and Framerate: Streaming at 1920x1080 resolution at 30 frames per second (fps) is the standard for most educational content. It looks great without demanding a huge amount of bandwidth from you or your viewers.
Audio Bitrate: Make sure this is set to at least 128 kbps to keep your voice coming through crisp and clear.
The importance of live video is absolutely exploding. In fact, live video streaming became the undisputed leader in the UK video streaming market in 2024, pulling in a massive 76.28% revenue share of a nearly USD 14 billion industry. Projections show it’s only going to get bigger through 2030, which really shows how central this format has become.
When you're thinking about platforms that can help manage the event itself, exploring options like the saucial platform can offer some great insights into handling audience interaction and logistics. Getting this technical foundation right from the start ensures your live stream event isn't just seen—it's experienced as a polished and engaging educational moment.
Keeping Your Audience Engaged During the Event
Broadcasting is just the starting line for a successful live stream event; the real magic happens through interaction. Once you're live, your main goal isn't just to present content, but to build a shared experience. It's all about turning passive viewers into active participants who feel like they're part of the conversation.
An actionable tip is to avoid saving all questions for the very end. Instead, plan for a "Q&A break" every 15 minutes. This keeps the energy high and ensures your audience stays tuned in from beginning to end.
Fostering Real-Time Interaction with LMS Tools
Your LMS is already packed with tools designed to make your live stream feel dynamic and alive. Instead of thinking of your presentation as a one-way lecture, treat it like a facilitated discussion. The key is to actually use the features you already have.
A simple but incredibly powerful tool is the live poll. Don't just save it for a quick icebreaker at the start. Weave polls directly into your teaching moments. For example, after explaining a tricky part of a new workflow in a corporate training, you could launch a poll asking, "Which part of the new workflow feels the least clear? A, B, or C?" The results give you instant feedback, letting you know exactly where you need to spend a little more time.
Another brilliant feature is the dedicated Q&A module. Many streaming platforms offer this separate from the general chat, which is a massive help. It often allows participants to "upvote" questions, pushing the most popular ones right to the top. This simple bit of organisation means you're addressing what most of your audience is curious about.
The Crucial Role of a Moderator
Let’s be honest: trying to present, keep an eye on the chat, manage polls, and answer questions all by yourself is a recipe for disaster. This is where a dedicated moderator becomes your secret weapon during a live stream event. They are the essential bridge between you and your audience.
Here’s a practical breakdown of a moderator's duties:
Filter the Chat: They can post helpful links you mention, handle simple logistical questions ("Will this be recorded?"), and filter out off-topic comments.
Manage the Q&A: Your moderator can group similar questions and feed them to you at natural breaks, saying, "Dr. Smith, we have several questions about the 19th-century sources you mentioned."
Launch Polls: You can simply give your moderator a verbal cue like, "Let's launch that poll now," allowing you to stay focused on delivering your content.
By bringing a moderator on board, you free yourself up to do what you do best: present your material with confidence and energy. It instantly elevates the production quality and creates a far more professional and organised experience for your learners.
Making Your Content Inclusive and Accessible
Engagement isn't just about polls and Q&A; it's about making sure every single person can follow along. Accessibility shouldn't be an afterthought—it needs to be a core part of your engagement strategy. Luckily, modern technology provides some fantastic support here.
AI-powered live captioning is a complete game-changer. Integrated platforms like MEDIAL can generate real-time captions as you speak. This is obviously vital for participants who are deaf or hard of hearing, but it's also a huge help for anyone watching in a noisy office or for whom English is a second language.
To really nail accessibility:
Describe Your Visuals: When you show a graph, don't just say, "As you can see here..." Instead, say, "This bar chart shows a 50% increase in sales in Q3, which is the key takeaway."
Use High-Contrast Slides: Use a tool like a free online contrast checker to ensure your text and background colours are easily readable for people with visual impairments.
Share Resources in Advance: Upload your slide deck to the LMS 24 hours before the event. This allows attendees using screen readers to familiarise themselves with the content ahead of time.
When you intentionally build these engagement and accessibility tactics into your live event, you create a far more dynamic, inclusive, and memorable learning experience. You’re sending a clear message to your audience: their participation isn't just welcome, it's essential.
Maximizing Impact After Your Live Event Ends
Think your work is done once the live stream cuts out? Think again. The end of the broadcast is really just the beginning of your content's life as a durable educational asset. This post-event phase is where you get to extend the learning, figure out what really landed with your audience, and build a lasting resource they can return to again and again.
Following a few simple steps transforms a one-time event into a powerful tool for asynchronous learning. By methodically polishing, enriching, and sharing the recording, you ensure every ounce of effort continues to deliver value long after you've gone offline.
Polishing Your Recording for On-Demand Viewing
As soon as your event wraps up, the raw recording is ready and waiting. Most modern platforms, including MEDIAL, give you simple in-browser tools to quickly trim the video. It’s a small step, but it makes a huge difference in professionalism.
Your first move should always be to trim the "dead air" from the beginning and end—that awkward 5 minutes of "is this thing on?" before you officially kicked off or the few moments after you signed off. A clean start and finish make the on-demand version far more inviting.
Actionable Step: Open the recording, drag the start handle to the moment you begin speaking, and the end handle to just after your final words. Click save.
No Complex Software Needed: The beauty here is that you can do this right in your web browser. No need for specialised video editing skills or fancy software.
Once it's trimmed, publish it directly within your LMS. This makes the recording available on-demand, housed securely right inside the same course module where the original live stream event took place. Easy.
Diving into Analytics to Understand Engagement
Data is your best friend for making your next event even better. Your LMS and streaming platform are sitting on a treasure trove of analytics that tell a story about what worked and what didn't. This is about more than just counting heads; it’s about understanding viewer behaviour.
Look for these specific, actionable metrics:
Attendance and Drop-off Rates: A chart showing a big viewer drop-off at the 20-minute mark might indicate that a particular segment was too complex or not engaging enough.
Engagement Hotspots: Many platforms offer "heatmaps" on your recording's timeline, showing you which parts were re-watched the most. If everyone re-watched your demonstration of a specific formula, that's a signal to create a separate micro-learning video on that exact topic.
Q&A and Poll Data: Go back through the questions asked and the poll results. If 80% of your audience answered a poll incorrectly, you know you need to revisit that concept in your next session.
By analysing these patterns, you can make smarter decisions next time. If a particular Q&A segment saw a massive spike in engagement, maybe your next event should be a dedicated 'Ask Me Anything' session.
This data-driven approach turns every event into a learning opportunity. Live streaming has grown at a dizzying pace, and understanding your audience is how you stand out. To put it in perspective, in 2024, live video streaming absolutely dominated the UK video market, capturing a massive 76.28% revenue share and generating the bulk of the sector's USD 13,987.9 million total revenue. You can find more insights about UK digital entertainment market trends on S&P Global.
Enhancing Accessibility with AI-Generated Transcripts
With your recording polished and published, you can add another layer of value with AI-generated captions and a full transcript. This is a game-changer for both accessibility and usability.
Captions are essential for learners who are deaf or hard of hearing, but they also help viewers in noisy places or anyone for whom English is a second language.
An actionable insight is to download the AI-generated transcript, spend 10 minutes correcting any mistakes (like misspelled names or technical terms), and then re-upload it. This small effort dramatically improves accuracy. It turns your video into a searchable document. A student can just hit "Ctrl+F" to find the exact moment you mentioned a key term, transforming the recording from a passive video into an efficient study tool.
Following Up to Reinforce Learning
Finally, it’s time to close the loop. A thoughtful follow-up announcement in your LMS reinforces the key takeaways and keeps the conversation going.
Here is a practical template for your follow-up post:
Link to the Recording: "For those who missed it or want a recap, here's the link to the on-demand recording of our session on [Topic]."
Attach Key Resources: "You'll also find the slide deck and the full transcript attached to this post for your reference."
Pose a Follow-Up Question: "To keep the conversation going, head to our forum and share one way you plan to apply what we discussed today."
This final step cements the learning and shows your audience you're invested in their journey, making sure the impact of your live stream event resonates for weeks to come.
Got Questions About Hosting Live Stream Events?
Venturing into educational live streaming for the first time? You're not alone. It’s natural to have a few questions, whether you’re a seasoned lecturer or new to corporate training. Getting clear answers to the common queries is the first step toward turning any uncertainty into a solid, actionable strategy.
Thinking through potential issues before they pop up is the hallmark of a well-prepared educator. Let’s tackle some of the most frequent questions to make sure your event runs as smoothly as possible.
What’s the Best Way to Handle Technical Issues?
Preparation is your strongest defence against those dreaded mid-stream technical glitches. The key is to have a structured plan and, crucially, a dedicated support person ready to jump in the moment something goes sideways.
An actionable plan is to run a full tech rehearsal 24 hours before the event, using the exact same setup and internet connection. During the live broadcast, your co-host or moderator should be your first line of defence. If an issue like audio loss crops up, they can instantly post in the chat: "We're aware of the audio issue and are fixing it now—thanks for your patience!"
This kind of proactive communication is a lifesaver. It prevents widespread panic and keeps your viewers in the loop.
A simple message like, "We're aware of the audio issue and are fixing it now—thanks for your patience!" can instantly calm an audience. It buys you the precious time you need to sort the problem out behind the scenes.
Having backup kit, like a spare USB microphone ready to plug in, is also a practical step. For platform-wide issues, direct users to a pre-arranged channel, like an LMS announcement forum, for updates.
How Can I Make Sure My Event Is Secure?
Hands down, the most robust way to secure your live stream is to integrate it directly with your Learning Management System (LMS). This simple move completely sidesteps the security risks that come with sharing public links on the open web.
When you schedule and embed the live stream event within a specific course in Moodle or Canvas, it automatically inherits that course's enrolment permissions. This is a game-changer. It means only authenticated users who are officially enrolled in that course can get in.
This method effectively creates a digital "walled garden" around your content. It ensures your intellectual property is protected and that only the intended audience can participate. For any serious educational content, using a platform designed for secure LMS integration isn't just a nice-to-have; it's non-negotiable.
Can I Reuse Content from a Live Stream?
Absolutely, and you really should. Squeezing every last drop of value out of your live content is one of the format's biggest perks. It turns a one-time broadcast into an educational resource that keeps on giving. Most professional streaming platforms will automatically record your session for you.
Once the event wraps up, use simple in-browser editing tools to trim the start and end of the video, leaving you with a clean, professional recording. From there, you can publish the full recording within your LMS for learners who missed the live session.
But don't stop there. Here are three actionable ways to reuse your content:
Generate AI transcripts and spend 15 minutes cleaning them up. Now you have a blog post or a downloadable PDF.
Clip key highlights, like a 2-minute explanation of a core concept, to share as micro-learning assets in other course modules.
Repurpose the Q&A segment into a standalone FAQ video or document, addressing the most common student questions.
This strategy really maximises your effort, extending the life and impact of your event well beyond the live broadcast.
Ready to host secure, engaging, and seamlessly integrated live events within your LMS? MEDIAL provides all the tools you need, from live streaming and recording to AI-powered captioning and in-browser editing. Schedule a demo today to see how you can elevate your educational content.
Comments