
How Does a Webinar Work? a Practical Guide for 2026

You've been asked to teach online, the invitation needs to go out, and someone has already asked whether there'll be a recording. You can share slides in a meeting, but organising questions, recording permissions, captions and a replay inside your learning management system feels like a different job.
So, how does a webinar work? The live presentation is only part of the answer. A well-organised webinar takes learners from a clear invitation to a useful, accessible recording, without leaving the presenter to manage every technical and administrative task alone.
How a Webinar Runs From Invitation to Replay
Say you're a lecturer preparing a 45-minute session for 120 students across two time zones. Your invitation email needs to explain what students will learn, when they should join, how they can participate and where they'll find the replay. Those details shape the session before anyone switches on a microphone.
A webinar is a live, internet-based session in which a presenter shares audio, video, slides or a screen with remote attendees. When recording is enabled, learners can also revisit the presentation afterwards. Unlike uploading a video, running a webinar gives you an opportunity to respond to learners while they're watching.
The infrastructure is familiar to most UK households: the Office for National Statistics reported that 96% of households in Great Britain had internet access in January–February 2020, compared with 57% in 2006. However, access alone doesn't guarantee that every student has a quiet room, reliable connection or suitable device.
The journey your learners follow
This overview shows how the invitation, live teaching and replay fit together.
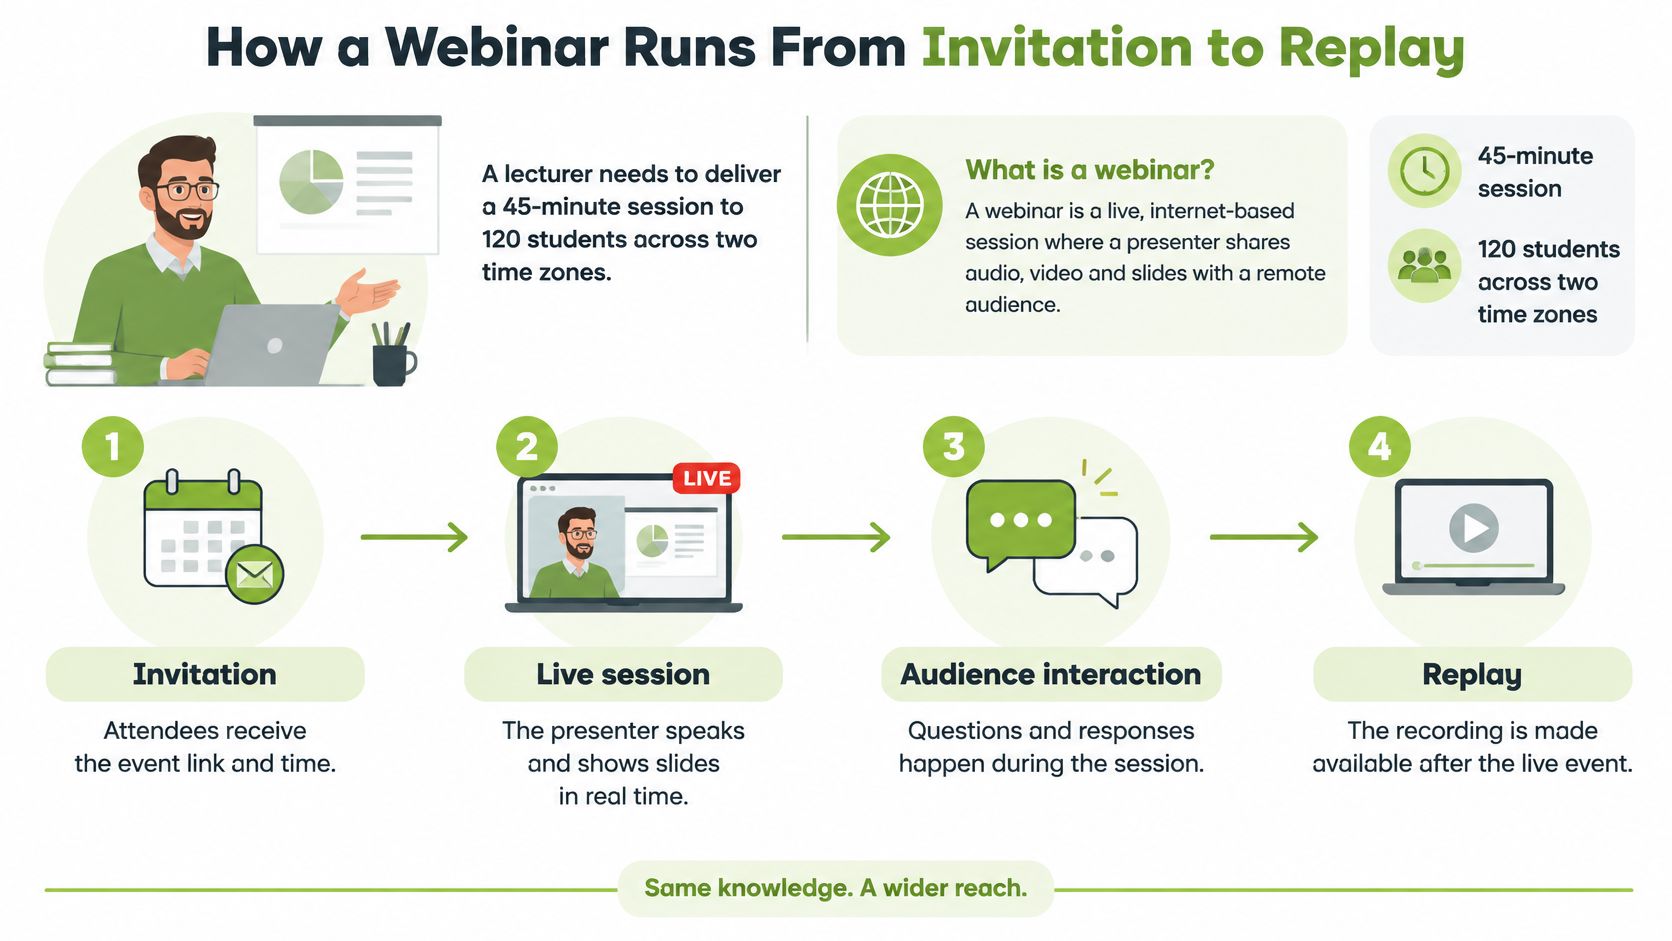
Stage | What the organiser does | What the student experiences |
|---|---|---|
Schedule and register | Sets the date, time zone and capacity, then distributes registration details | Receives confirmation and a joining link |
Join | Opens the room and admits participants from a waiting room, where enabled | Opens a browser or app and checks sound |
Present | Shares slides or a screen, using the webcam for context | Watches the demonstration or explanation |
Interact | Invites chat, polls, Q&A and microphone contributions | Asks questions and checks understanding |
Record | Announces recording on screen and confirms it has started | Knows which contributions may be captured |
Replay | Reviews and publishes the recording, captions and slides | Revisits materials in the course area |
Although recording appears as a separate responsibility, start it before the teaching you intend to capture, not after the discussion has finished.
Give each responsibility an owner
The host delivers the teaching and controls the room. A co-host or moderator watches questions, while a technical producer checks audio, screen sharing and recording. Colleagues can combine roles for a small event, but name the responsibilities explicitly.
For an open event, your webinar invitation and promotion plan should make the audience and learning outcome clear, rather than announcing a topic.
Before sending the invitation:
Confirm the time zone, including how it appears in the calendar invitation.
Test screen sharing and sound fifteen minutes early, using the actual presentation equipment.
Name a backup presenter who has the slides and permission to take over if your connection drops.
How Live Video Reaches Every Attendee
Your camera doesn't send an unprocessed picture directly to every learner. The platform handles a relay of media processing and delivery, and a problem at any handover can affect what attendees see.
The streaming process is easier to understand when you separate those handovers.
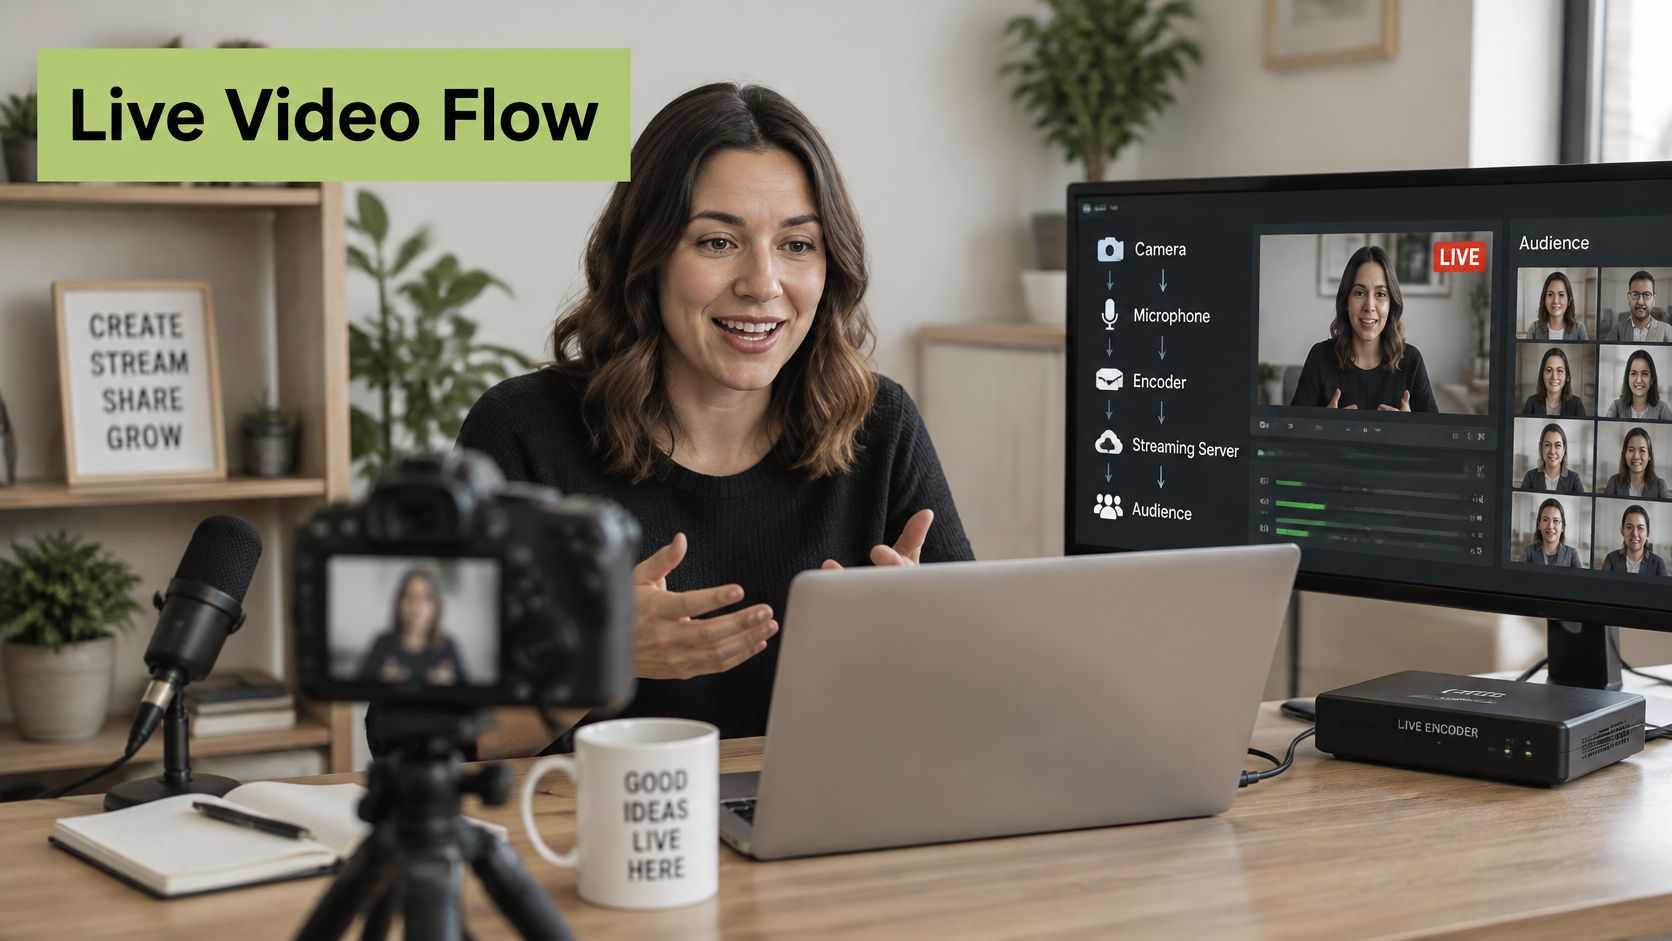
From microphone to playback
Capture and encode. Your computer captures the microphone and camera, then compresses their output into audio and video that can travel over the internet.
Upload. Your connection sends that compressed media to the platform's streaming service.
Distribute. The service passes the stream through delivery infrastructure, often including a content-delivery network, to reach remote viewers.
Decode and play. Each attendee's browser or app reconstructs the media and plays it, using a buffer to absorb interruptions.
Latency is the delay across capture, encoding, transport, buffering and playback. Lower latency helps conversation feel natural, but a smaller buffer gives the player less protection against fluctuating bandwidth or lost packets.
Ofcom's Mobile Matters 2025 report records average 5G and 4G response times below 25 ms, with uninterrupted video completion of 98.2% on 5G, 96.6% on 4G and 88.3% on 3G. These are network measurements, not a promise that your webinar will have the same end-to-end delay.
Protect the presenter's upload
A fast attendee connection can't repair media that left the presenter's computer with missing frames or damaged audio. Upload performance, Wi-Fi contention and connection stability matter as much as the broadband package's headline download speed.
The following are practical rehearsal targets, not universal platform requirements.
Typical bandwidth needs by role
Role | Bandwidth needed | Practical note |
|---|---|---|
Presenter with webcam | Aim for 4–5 Mbit/s upload in your rehearsal | Use a wired connection and test upload in the busiest hour |
Attendee on broadband | Plan around 2–3 Mbit/s download for the trial session | Adaptive streaming lowers quality if needed |
Attendee on mobile data | Enough sustained download for the selected quality setting | Offer slides and captions as a fallback |
Adaptive-bitrate delivery changes picture quality as available bandwidth changes, rather than insisting on a resolution the connection can't sustain.
Connection check: Run your speed test at the presenter's desk during the busiest hour of the day, not on a quiet evening. Then make a test recording with the camera and screen share running.
Interaction Tools and Who Controls Them
A webinar becomes interactive through two-way communication. Attendees receive your presentation while sending questions, reactions, poll answers or spoken contributions back to you. Without a clear route for those contributions, you're broadcasting rather than teaching responsively.
This uses the same broad communication habits reflected in ONS internet usage statistics, but the important teaching decision is who can contribute, through which tool, and when. Synchronous participation happens together during the live event; asynchronous participation happens later through replay and associated activities.
Match the tool to the teaching task
Chat works for quick questions, links and brief responses. Tell learners whether everyone can see their messages.
Moderated Q&A separates questions from conversation. Where supported, upvoting helps the moderator identify shared concerns.
Polls reveal understanding before you move on. Ask about a misconception, not just whether everyone is enjoying the session.
Reactions provide lightweight acknowledgement without interrupting the speaker.
Hand-raising and microphone requests support spoken discussion while letting the host manage turn-taking.
For example, you could plan a 60-minute webinar with polls at minutes 10, 30 and 50, and reserve the final 15 minutes for Q&A. The last poll can introduce that discussion rather than compete with it. These are choices for a worked teaching plan, not an attendance benchmark.
Make participation predictable
Mute attendees on entry, explain how they can request to unmute, and assign a moderator to read questions aloud. Repeat the question before answering so learners don't need to follow a fast-moving chat to understand your response.
Text participation should be a full route into the discussion, not a lesser alternative. Someone working in a shared office, using assistive technology or unable to speak live should still be able to ask a substantive question.
Collect questions through the registration form. You'll have a useful opening discussion ready even if nobody volunteers immediately.
Captions, Transcripts and Recording Timing
The most useful timing distinction is in UCL's captioning guidance: live webinars don't need accurate captions at the moment of streaming, but recordings available online for more than 14 days are treated as pre-recorded content and must have captions synchronised with the audio. Don't treat that distinction as a reason to withhold live captions or ignore individual accessibility needs.
Plan live automatic captions and reviewed replay captions as separate tasks. Automatic speech recognition can struggle with background noise, accents, specialist vocabulary and overlapping speakers. Use a close microphone, reduce room noise and ask contributors to speak in turn.
Review more than spelling
Home Office accessibility guidance says captions should follow speech timing, identify speakers, include important sounds and be checked when generated automatically; it also recommends an HTML transcript. Check names, technical terms, slide references and meaning-changing punctuation before publication.
For public-sector learning, Government Communication Service guidance recommends captions and a separate transcript for pre-recorded video, with captions viewers can switch on or off. A transcript helps learners search and review material, but it doesn't replace synchronised captions.
Caption and transcript requirements by recording status
Recording status | Caption requirement | Action | Deadline |
|---|---|---|---|
Live session, not kept online | Automatic captions acceptable during the stream, subject to access needs | Save a transcript for your own records only where justified by your retention policy | Same day |
Replay online for 14 days or fewer | Automatic captions acceptable as an interim approach | Check names, terms and speaker changes | Day 10 at the latest as an internal target |
Replay online for more than 14 days | Captions synchronised with the audio | Correct and publish the caption file | Before day 14 |
UK public-sector course replay | Captions plus a separate transcript, with switchable captions | Publish both alongside the video | Before students are assigned the recording |
The table's review dates are a practical production schedule, not additional statutory deadlines.
Put the review in someone's calendar
Use an accessible player with keyboard controls and avoid autoplaying sound. Our guide to making videos accessible can help you check the surrounding viewing experience as well as the text.
Set your internal caption-review deadline on day 10 at the latest. Assign a named editor and allow time to upload the corrected file and test it in the learner-facing player.
Privacy, Consent and Recording Notices
Recording everything by default can create more governance and safeguarding risk than learning value. A student's personal disclosure may be relevant to a live discussion but unsuitable for a course recording. Decide what you need to capture, rather than assuming every camera, chat message and question belongs in the archive.
Registrations, attendance records, chat, audio, video, captions and transcripts can contain personal data. Document their purpose, lawful basis, access arrangements and retention period. Ofqual's privacy notice for online events and meetings describes editing recordings to remove sensitive information and improve accessibility, alongside defined retention arrangements.
Notice isn't the same as consent
A recording announcement tells people what's happening. It doesn't, by itself, establish consent or determine the appropriate lawful basis. Where you rely on consent, it must be specific and informed, and refusing must be a meaningful option.
The Information Commissioner's Office guidance on managing consent requires records of who consented, when, what they were told and how consent was captured. For an online form, keep the submitted information and timestamp linked to the relevant form version.
A practical design is an unticked recording-consent checkbox, separate from optional marketing permission, used only where consent is your chosen lawful basis. Provide a withdrawal route and establish how requests will be handled before publishing.
Follow a publication workflow
Issue a pre-event privacy notice. Explain the recording's purpose, audience and retention arrangements.
Announce recording on screen. Make the start visible rather than relying solely on an earlier email.
Offer moderated participation and an opt-out route. For example, let students send a private question that the moderator paraphrases anonymously.
Review chat, captions and video. Remove or anonymise sensitive material before release.
Restrict replay access. Publish to the intended course or staff group, not an unrestricted viewing page by default.
Set a deletion date and request process. Explain where people can raise concerns, and assess deletion requests under the applicable rules.
Check the edited transcript too. Removing a student's image won't protect their identity if their name and personal circumstances remain searchable.
Webinar Platforms and LMS Integration Compared
Suppose you teach in Teams on Tuesday, publish the reviewed recording in the course area on Wednesday, and ask students to submit a short video response by Friday. Your platform choice should support that whole teaching sequence, not just Tuesday's call.
The comparison below separates the live-event tool from the route learners take afterwards.
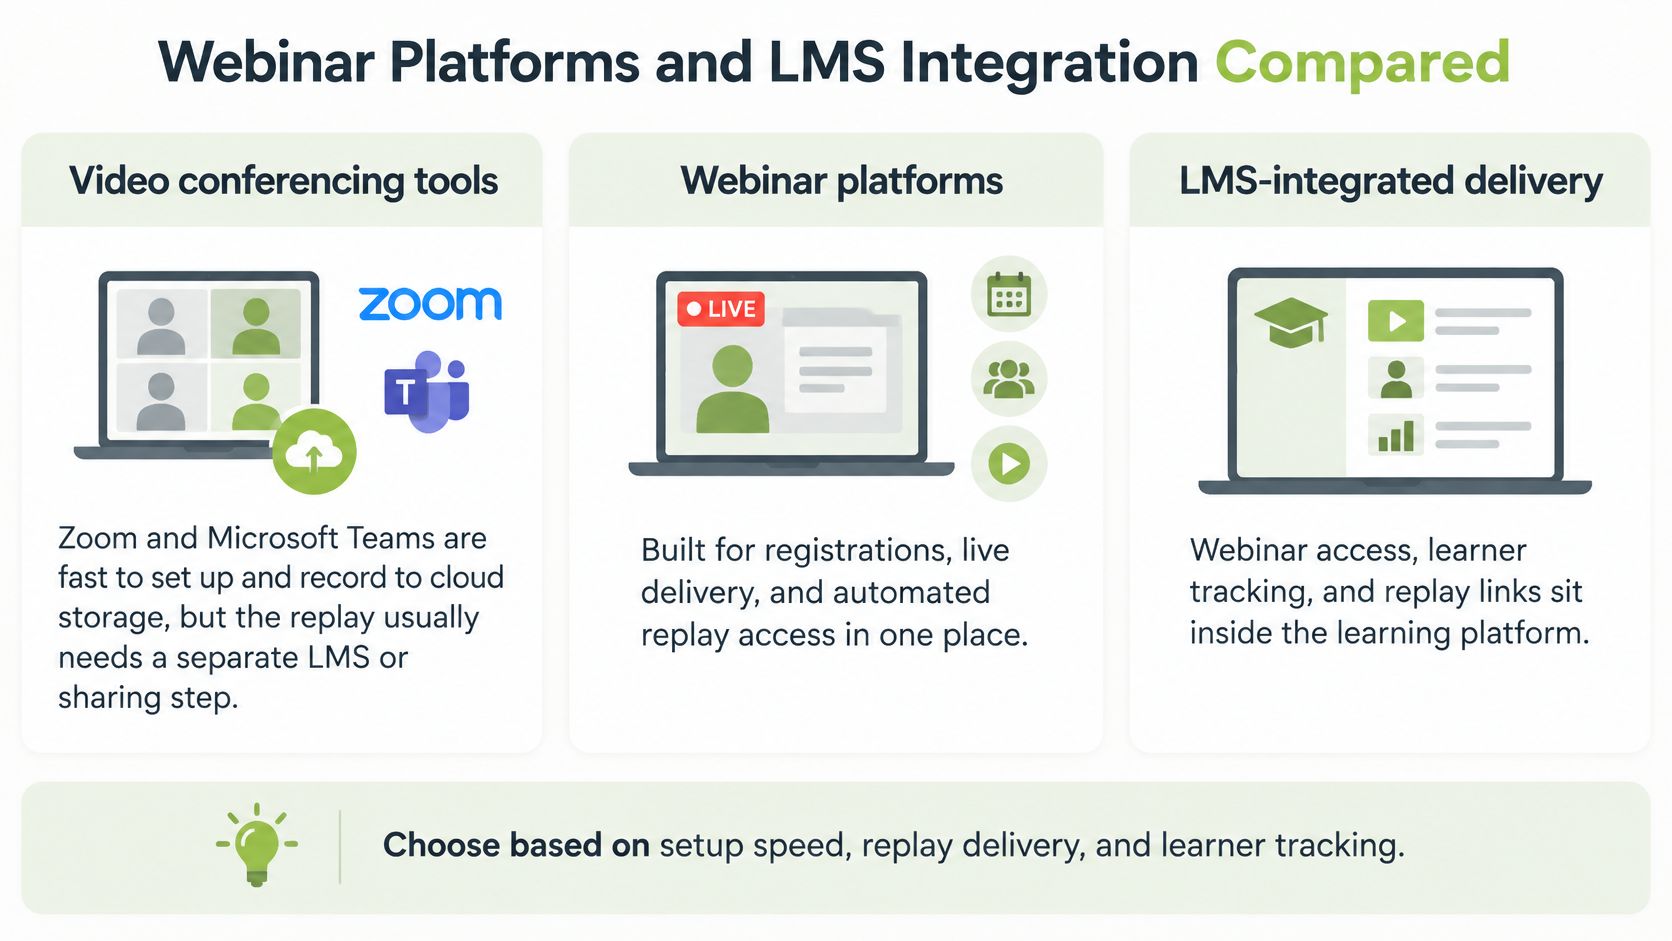
Compare the replay handover
Video conferencing tools such as Zoom and Microsoft Teams are familiar choices for discussion and staff sessions. Cloud recording is subject to account settings and permissions, and someone usually needs to manage the separate course-sharing step.
Dedicated webinar platforms organise registration, audience participation and attendance reporting around an event. Some offer their own replay pages, but delivering the recording inside an LMS may still require an export, upload or integration.
With our LMS-integrated video platform, MEDIAL, recordings, captions and video assignments can sit within Moodle, Canvas, Blackboard and D2L Brightspace workflows. We offer cloud or customer-hosted deployment; Teams recordings are automatically placed in users' LMS accounts so teachers can add or embed them in course pages with a few clicks.
Webinar platform types and how replays reach the LMS
Platform type | Examples | Replay route to the LMS | Best for |
|---|---|---|---|
Video conferencing | Zoom, Microsoft Teams | Cloud recording, then manual upload or embed without an integration | Small group sessions and staff meetings |
Dedicated webinar platform | Event-focused registration and broadcast tools | Export the file and upload it to the course | Large public audiences and marketing events |
LMS-integrated video | MEDIAL with Moodle, Canvas, Blackboard, D2L Brightspace | Recording becomes available through the LMS workflow for course placement | Teaching, assessed video tasks and student replays |
For a wider comparison, FOMOchat's guide can help you find the right webinar software. Evaluate those options against your teaching workflow using our webinar software guide for training, rather than choosing solely by the live presentation interface.
This demonstration provides a concrete reference for the course-video workflow.
Before choosing, answer: Where must the replay live? Who needs access? Must students respond on video? Test those tasks using a learner account, not just an administrator login.
Common Problems and How to Fix Them
Start troubleshooting with echo and feedback. Open attendee microphones and loudspeakers feeding sound back into a presenter's microphone are useful first checks. Mute the audience, put on headphones and ask a colleague to confirm whether the sound clears.
For frozen video, establish whether everyone sees the problem or only an individual attendee. If the whole audience reports it, investigate the presenter's upload and shared media first. If only one learner struggles, offer a lower-quality stream or alternative materials while checking their browser and connection.
Use the symptom to narrow the cause
Webinar symptoms, causes and fixes
Symptom | Likely cause | Fix |
|---|---|---|
Echo and feedback | Attendee microphones on, or presenter using speakers | Mute attendees on entry and use headphones, usually a minutes-long adjustment |
Choppy or frozen video | Presenter upload too slow | Try 720p as a troubleshooting setting and move to wired Ethernet; changing the setting takes minutes if the cable is ready |
Attendees cannot join | Expired link, wrong time zone or blocked browser | Resend the correct joining details and run a browser check, usually within minutes |
Captions wrong on names and terms | Automatic recognition without review | Edit the caption file before the publication deadline; allow one to two working days in your production plan |
Recording missing | Not started, storage full or no permission | Check recording status, storage and permissions before teaching; the check takes minutes |
Low engagement | Long stretches without a question, poll or contribution route | Put polls and discussion prompts into the run sheet before the session |
These are troubleshooting actions and planning allowances, not guaranteed repair times. A permission change may need an administrator, while a building network problem may need a longer investigation.
Recovery priority: Keep intelligible audio and essential teaching materials available before spending time restoring a perfect webcam picture.
Prevent the problem you can't repair afterwards
A missing recording deserves special attention because you may not be able to recover it. Give the producer responsibility for checking the recording indicator and confirming that the resulting file opens.
If learners remain silent, don't assume they're disengaged. Ask a specific, answerable question, allow thinking time and make the response route obvious. Build that opportunity into the presentation rather than improvising it while troubleshooting another problem.
Set Up Your First Live Session This Week
Prepare the replay workflow before the invitation. That forces decisions about access, captions and responsibilities while there's still time to change them. A successful rehearsal should end with a usable course recording, not merely a successful call.
Use this checklist to turn the earlier decisions into a practical preparation week:
Choose the platform category. Use the platform comparison to match small-group discussion, public-event registration or course-based video teaching to your audience.
Name the replay destination. Write down the course area or staff group that should receive it, and test access using an appropriate learner account.
Book the caption review. Assign the editor for publication day and put the internal review deadline into the calendar, leaving room for corrections.
Make a rehearsal recording. For example, run a ten-minute trial at your planned presentation time. Check upload, sound, screen sharing, captions and the finished playback.
Finish the privacy checks. Publish the notice before invitations go out. If you're relying on consent, verify that the unticked recording-consent control, consent log and withdrawal route work.
Test the whole learning task
Ask a colleague to join as a learner, locate the replay and open the transcript. If you intend to collect video responses, include a sample submission in the test rather than stopping at playback.
Our fully managed cloud service can connect in minutes to Moodle, Blackboard, Canvas or D2L Brightspace, but your institution still needs to test permissions and teaching arrangements. Complete the checklist and run the rehearsal first; then use a personalised demonstration to investigate any unresolved replay requirements.
MEDIAL offers LMS-integrated video for live teaching, recording management and course-based replay, with cloud and customer-hosted options. Once your rehearsal checklist is complete, visit MEDIAL to schedule a personalised demo and test how your webinar recording would reach learners inside your course.
Comments